How to Make an Art Quilt


drawing
Every new artwork begins with lots of drawing. Even before the drawing begins, though, I like to think about my subject matter. I like working with a theme, to creative a cohesive body of work. I see ideas for quilts in everything so selecting a theme also helps me to focus on something. I consider several things in choosing a theme. My worldview is important. I am inspired by God’s creation, and how everything works and fits together in it. The laws of nature, botanical and zoological interrelationships, and the God-given role of man in the natural world all stimulate me to further explore new ideas and designs in my textile art.
I also want to work with subject matter that speaks to me personally and is available to me in my immediate environment.
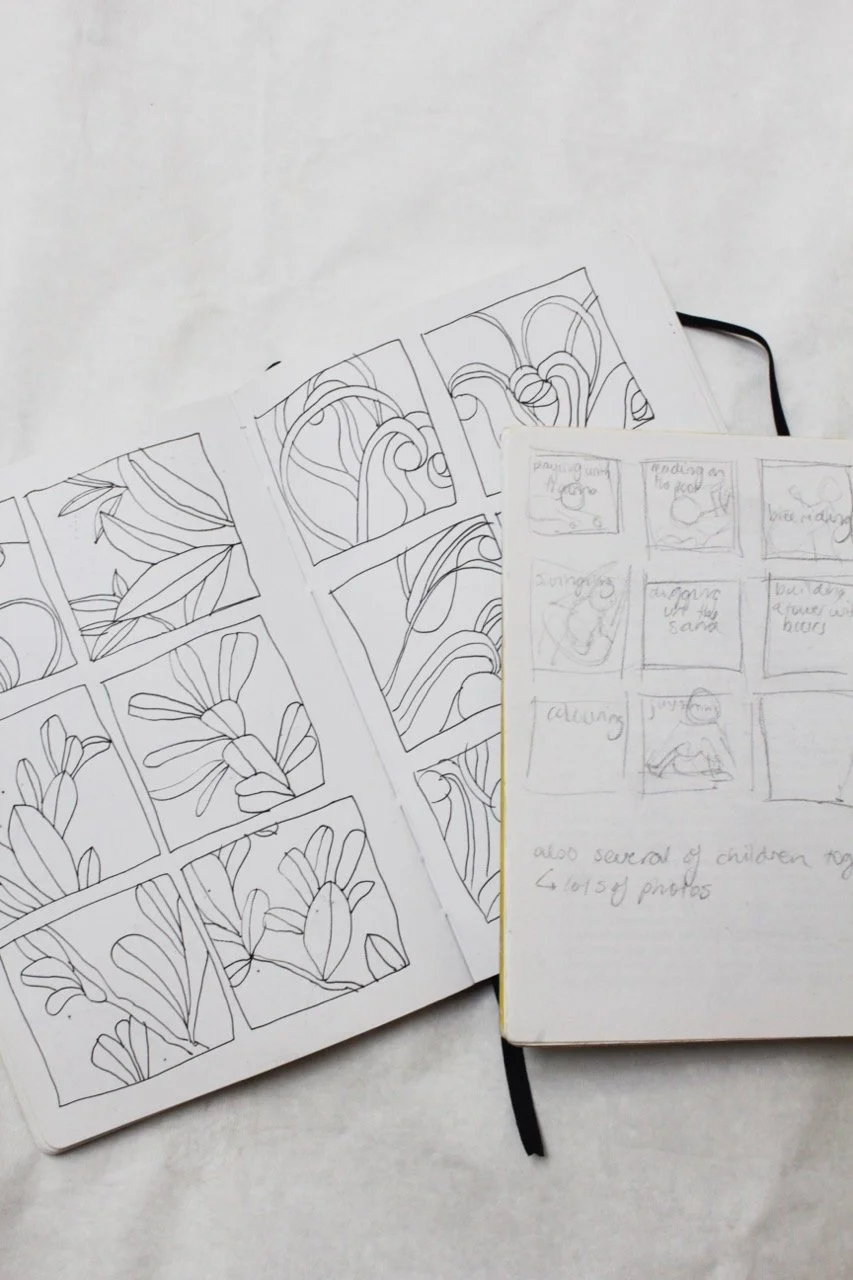
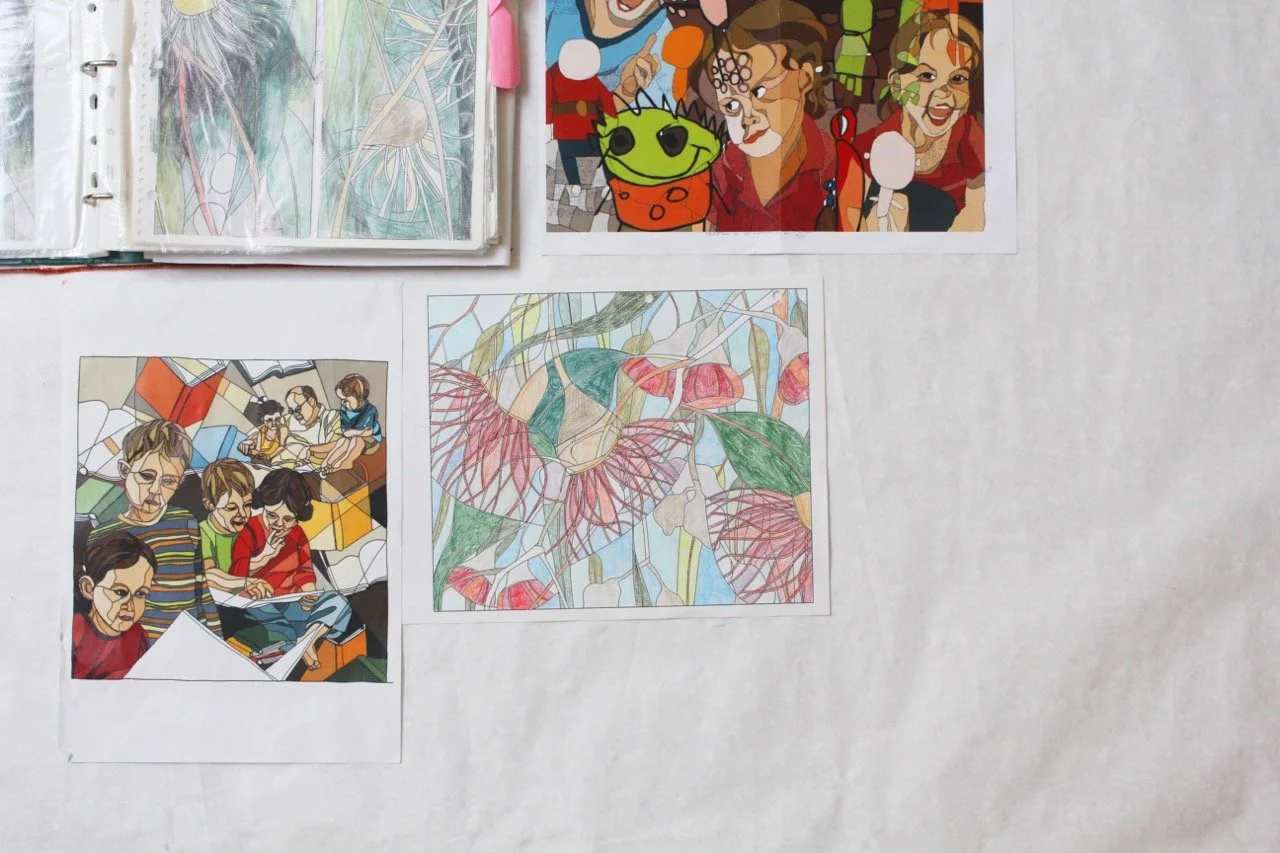
I currently have two themes happening in my artwork. My botanically themed artworks highlight the beauty of the plants and trees that are ‘everyday fare’ for us here in Australia. There is so much beauty in the details of each tree, for example, in the veins that produce pattern and texture on a eucalyptus leaf, and the huge variety of colour to be found on a single plant.
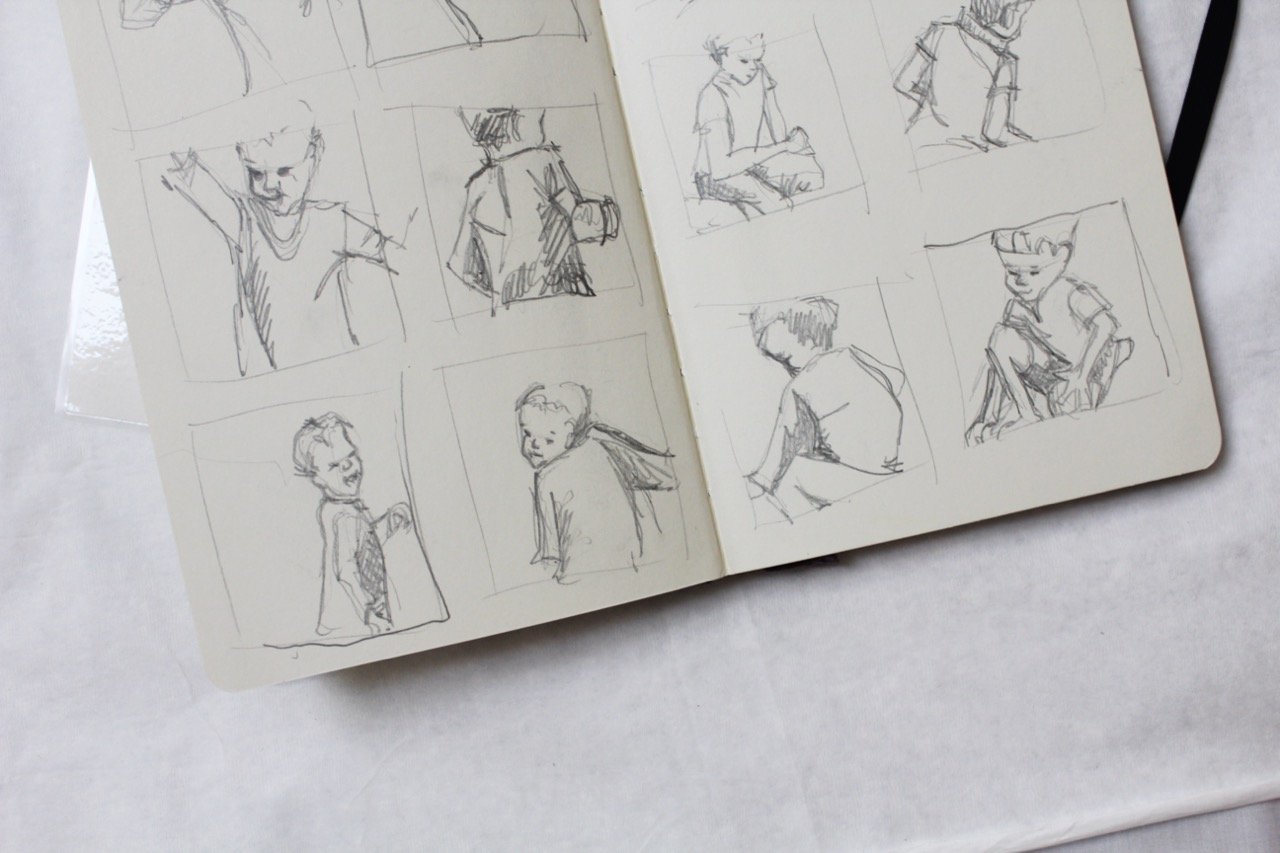
My childhood-themed artworks, although not quite as popular as the botanical pieces, are my current favourites, perhaps largely because they are more challenging for me. Observing children at play, these artworks aim to capture a sense of childlike wonder. As a mother I am privileged to observe that awe of little children discovering for the first time things which we as adults have long since taken for granted. Observing small children notice budding flowers, snail trails, ripening fruit, textured leaves, floating bubbles, dripping rain and pencil marks on paper for the first time is a wonderful reminder of just how special these ordinary things are. I hope I can retain some of that wide-eyed wonder myself, and continue to express it in my work.
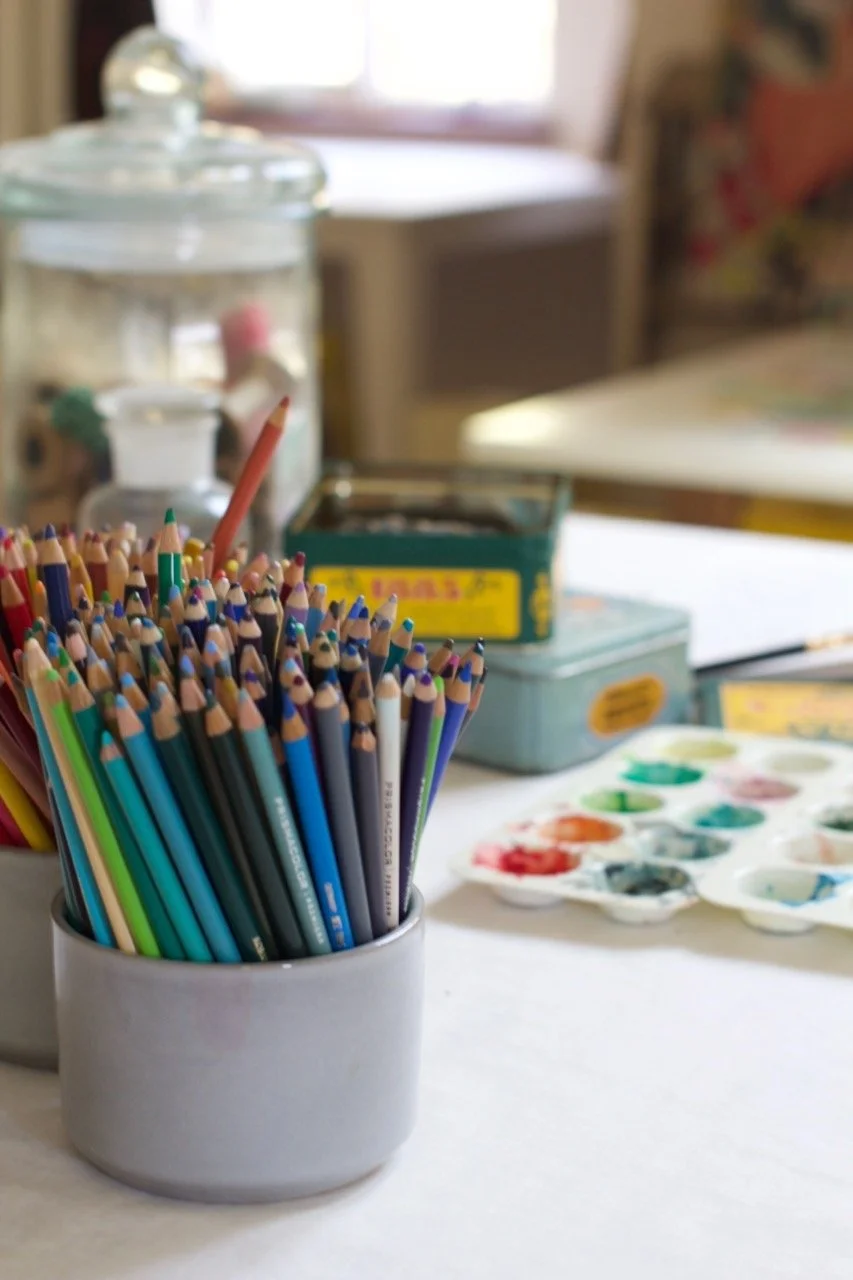
Having decided (perhaps broadly) on a theme, I do a lot of sketching. This time is fun, but can be frustrating. I never know how long it will take to develop several quilt designs I am happy with. I am thankful to be living in the age of digital cameras, as I like to take hundreds of photos of my subject matter, from all different angles, as a reference throughout the whole design process.
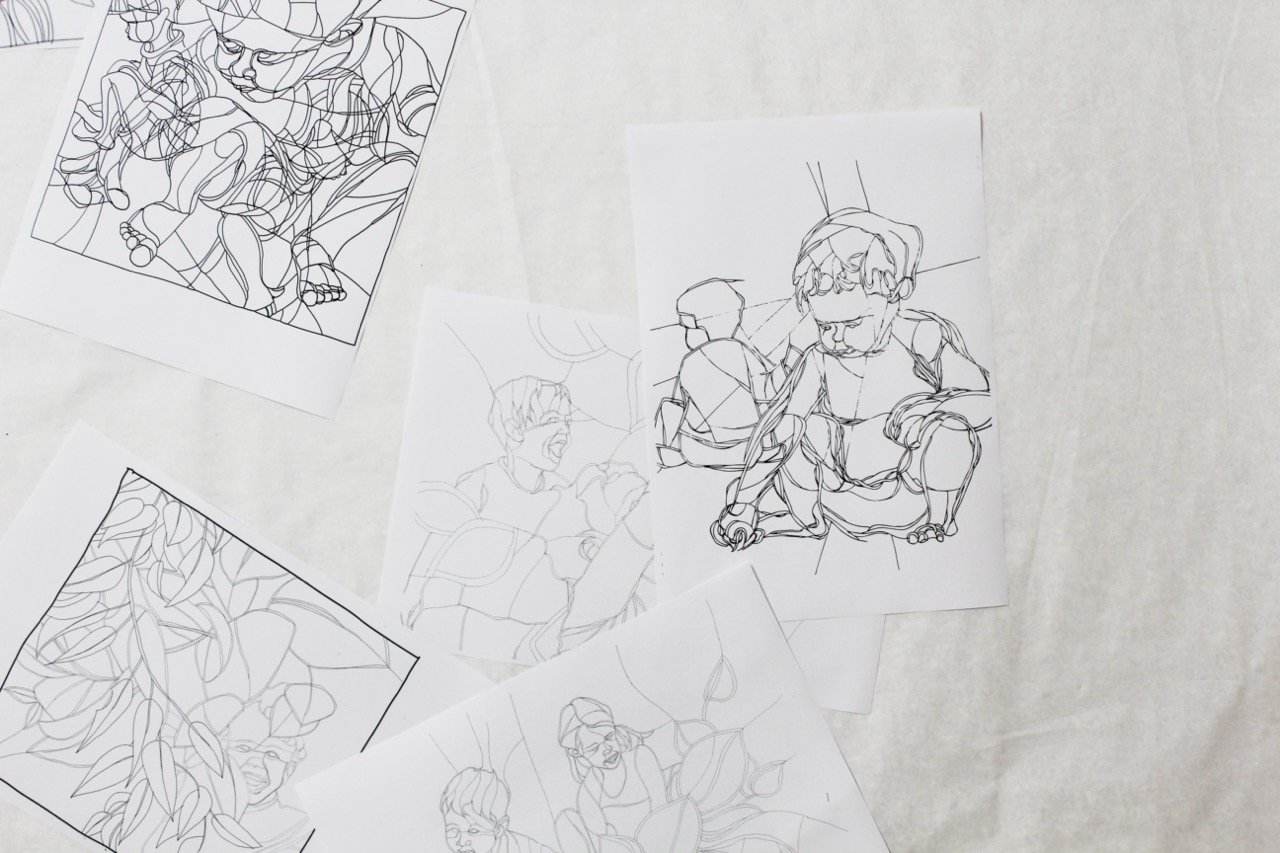
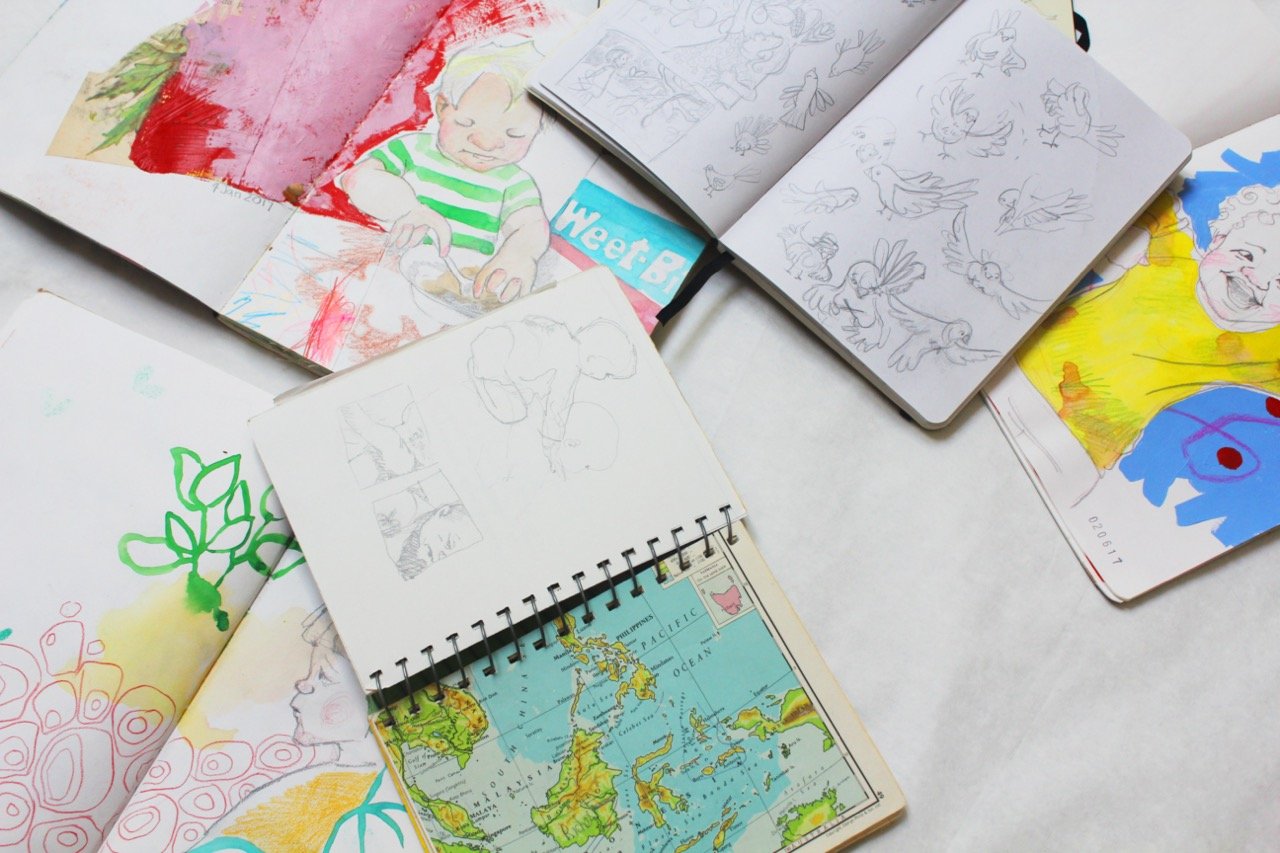
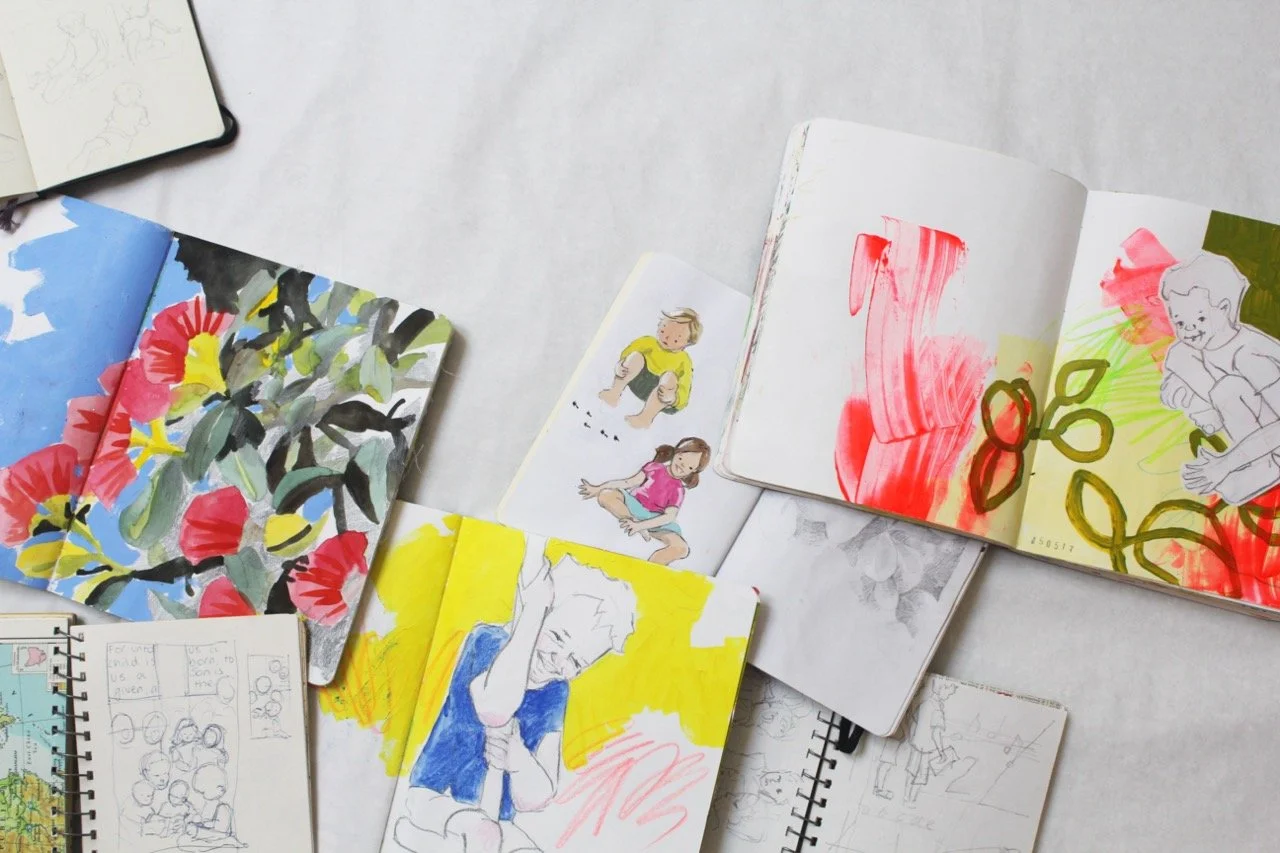
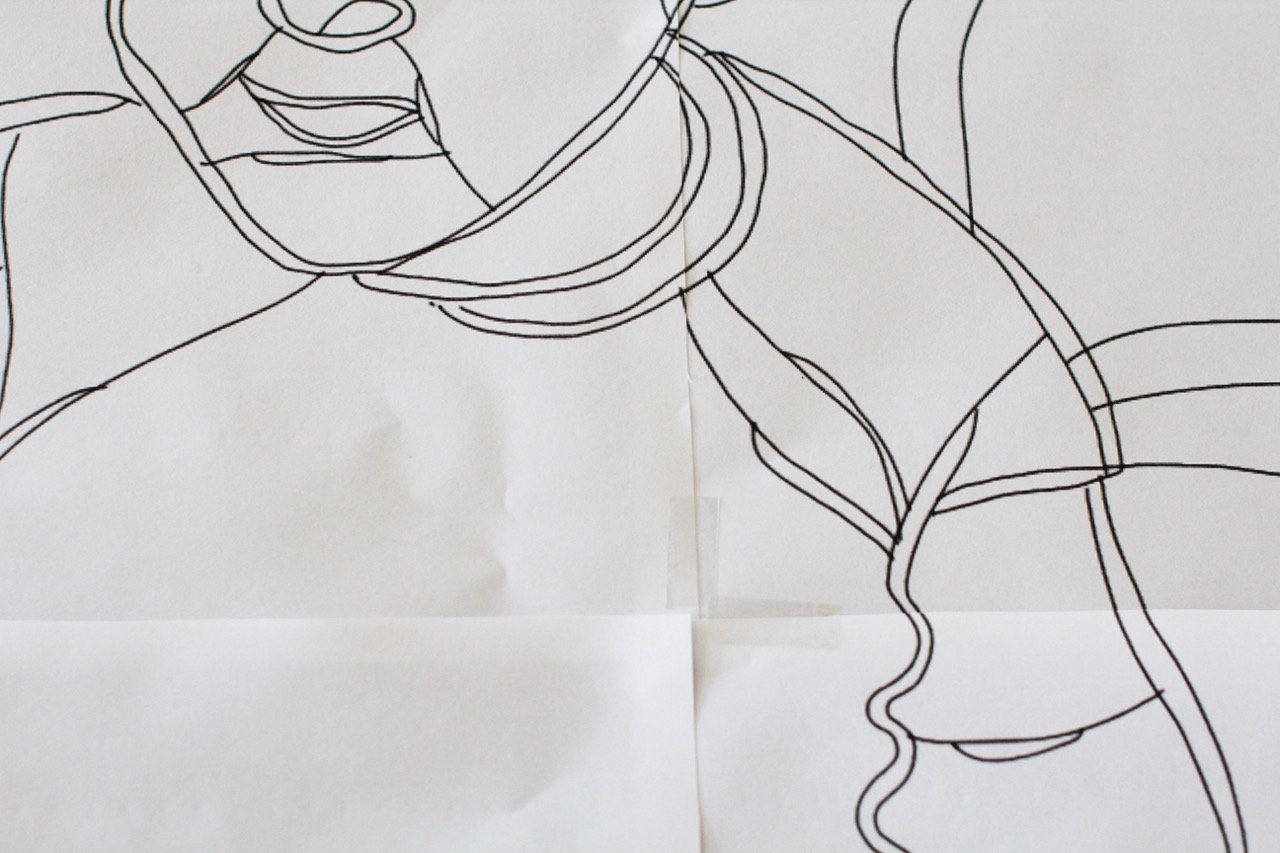
At first I draw without too much intent, familiarising myself with the subject matter. Then I will start developing my ideas, trying various alternative designs, and stylising my drawings so that they lend themselves to the style of quilts I like to make (specifically, to machine piecing). This process takes place in my visual diary, which is an important record to me. I constantly refer back to original ideas and inspirations as recorded there. By the end of this stage, I have a collection of all kinds of sketches – photorealistic (for familiarisation of subject), line drawings (with piecing in mind), quick thumbnail sketches, bold marker drawings (for developing overall layout without getting bogged down in detail), simple design layouts, as well as detailed line drawings with the quilting in mind.
I find quick thumbnail sketches very useful for working through a bunch of potential designs for a given artwork. When I’ve settled on a design concept that I like, I draw it up more completely.
The final step in the drawing process is to convert my sketched design to a pattern for piecing. This pattern shows all the cutting/seam lines for the final artwork. In other words, each white space in the sketch represents a separate piece of fabric.
preparing the design
When I think I have a final design which looks right and expresses what I want it to, I sit on it for a bit. I want to be sure that the design addresses the principles and elements of design. I want my quilts to be good quilts, but even more importantly I want them to be good art. There are currently several things I am specifically looking for in my finished designs. I want to see contrast of tone and scale, for the sake of an interesting quilt.
I also want to see various layers of interest, so that the viewer’s eye is caught from a distance and the viewer is drawn to take a closer look. I then want the viewer to be rewarded by a layer of interest that can only be appreciated up close (for example, detailed or textured quilting).
As an aside, I’d like to say at this point, that although I have already learnt so much in my quiltmaking journey, and had work accepted into many exhibitions and publications, with each new artwork I feel rather exposed when I first share it with others. I see the weaknesses, glaring or subtle. I have doubts about the quality of my work, and tell myself that those earlier pieces were probably just flukes. I questions whether my work should be more abstract or more representation or whether anyone even cares. To some extent, doubts like this are probably healthy, as they force me to aim higher with each new artwork. They force me to pay closer attention to the principles of design, and also to be true to the aim and subject of each piece.
Some quilts don’t make it to completion, because after a bit, I really just don’t like them. And a bunch that have made it to completion are now sitting on my ‘to burn’ pile. (Yes, that is a point of much debate according to my husband and friends, but they can debate all they like – I figure that decision is mine !). One of the reasons I find the design phase the difficult stage is because I like to work systematically. I like to breakdown my quiltmaking into manageable tasks, with specific daily aims for what I’d like to achieve, but of course there is no rushing this design phase. My quilts are all machine pieced and machine quilted, sometimes with screenprinting before or during the piecing. The nature of the work is therefore such that each artwork is almost completely designed before I get started with cutting out the fabric, leaving only a little room for adapting and developing the design down the track through screen printing or embroidery/quilting.
I usually colour a small image of the final design with coloured pencils as a guide for selecting fabrics later. More recently I have been taking a photo of a clear line drawing of the finished design and colouring it in using computer aided painting tools. This is much quicker than colouring with pencils, and more importantly, allows me to easily change colours around and try different colour schemes with a few clicks of the mouse. Or if I’m being lazy, I just wing it and decide on the colours as I go. (That gets a bit hair-raising on a larger artwork!).
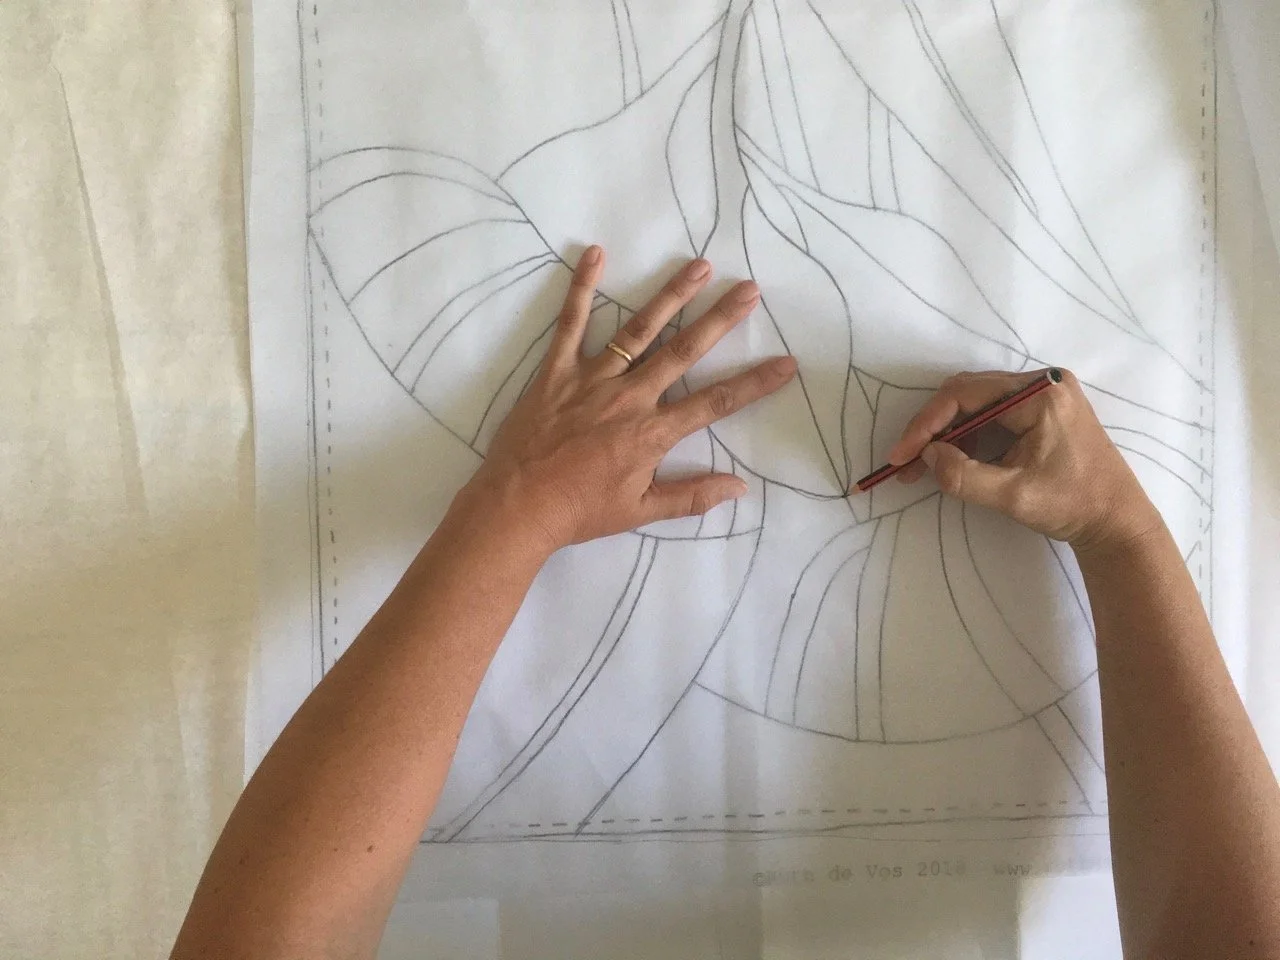
When I am happy with the design it is developed by computer or by hand into a pattern that can be pieced. This involves drawing in seam lines to make the quilt piecing managable. (For example, the only way to neatly piece a pointy gum leaf is to continue a seamline through the point of the leaf).
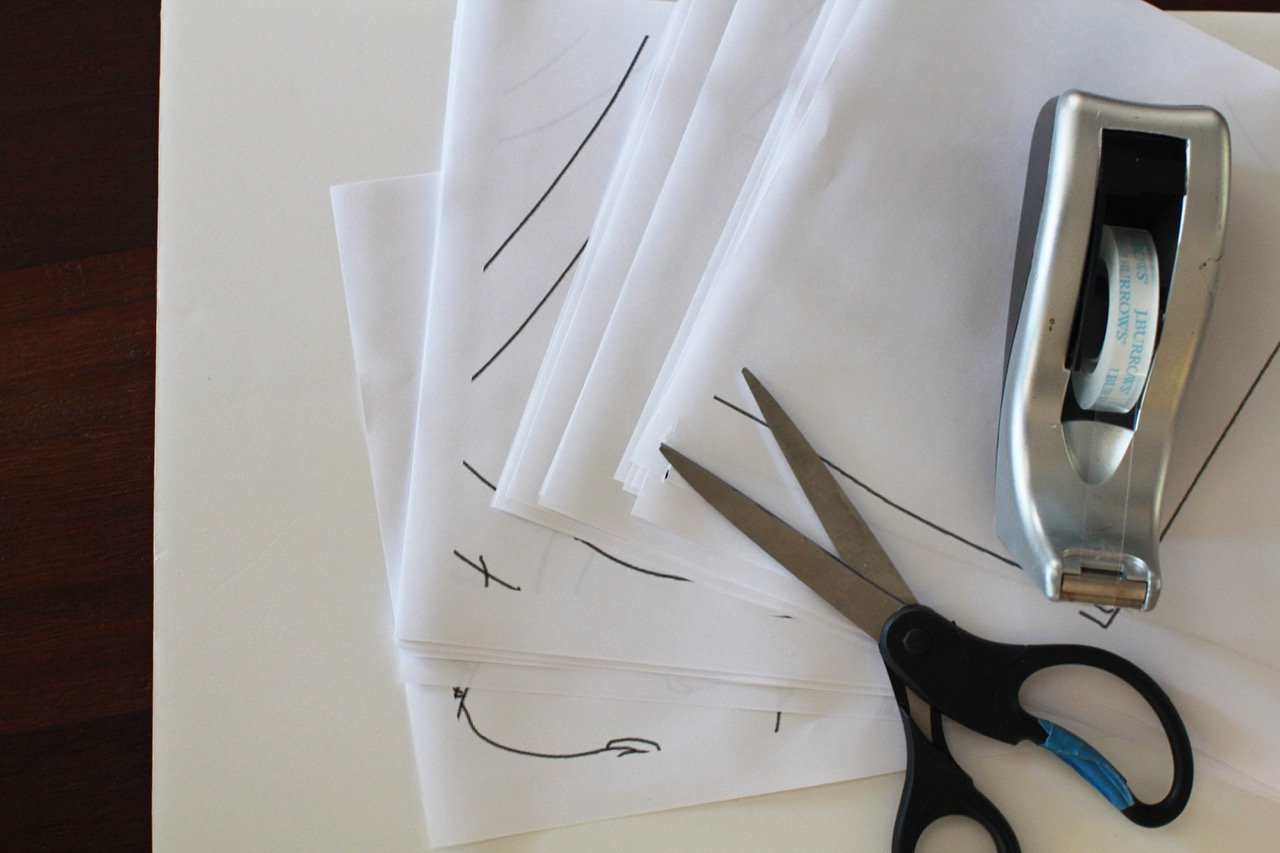
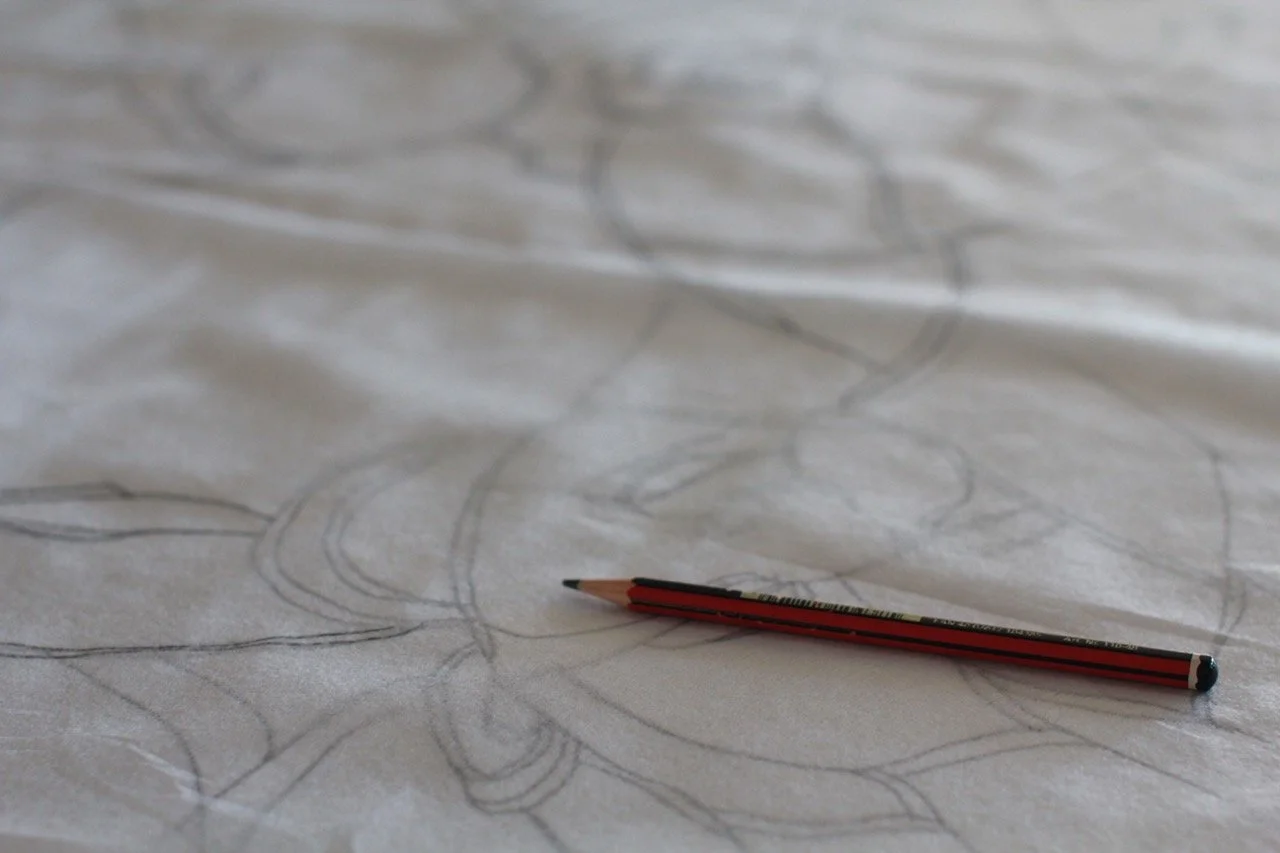
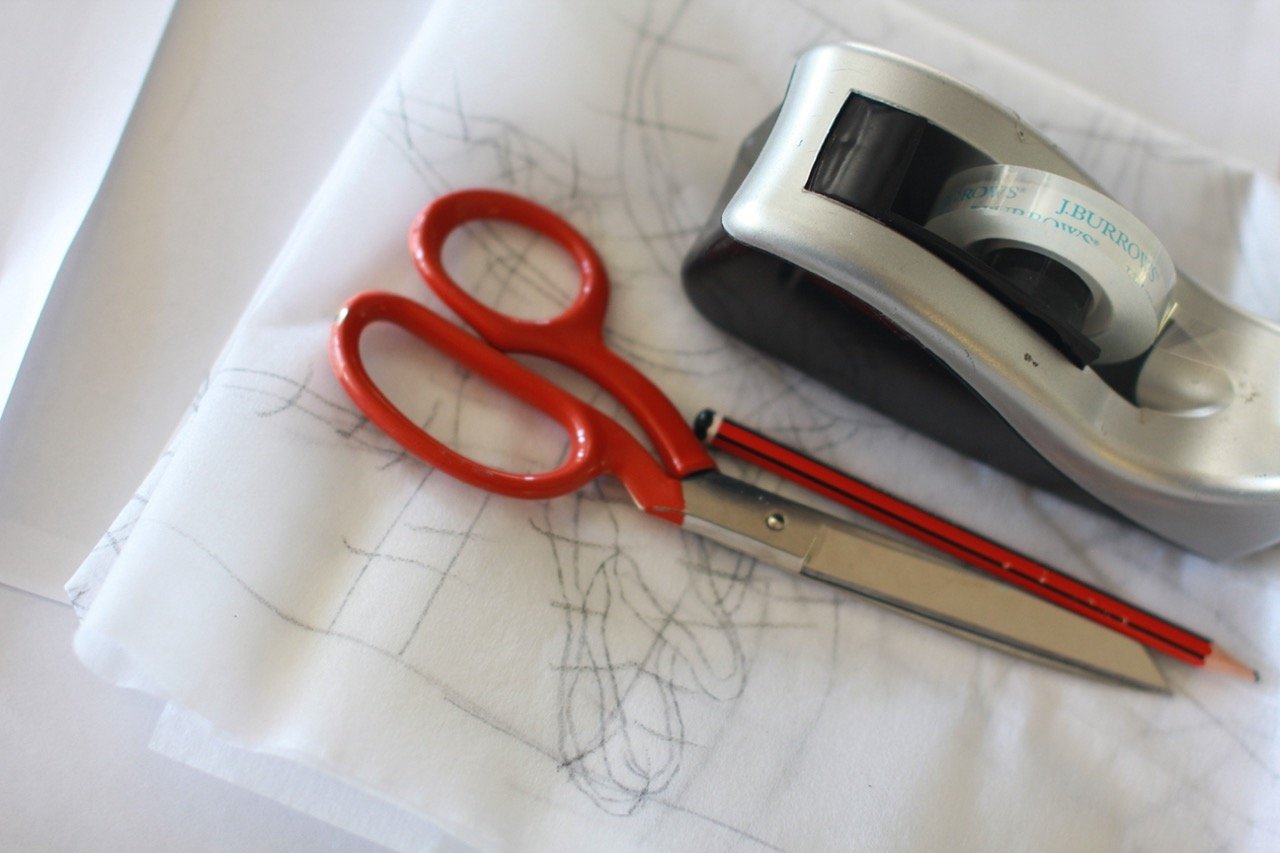
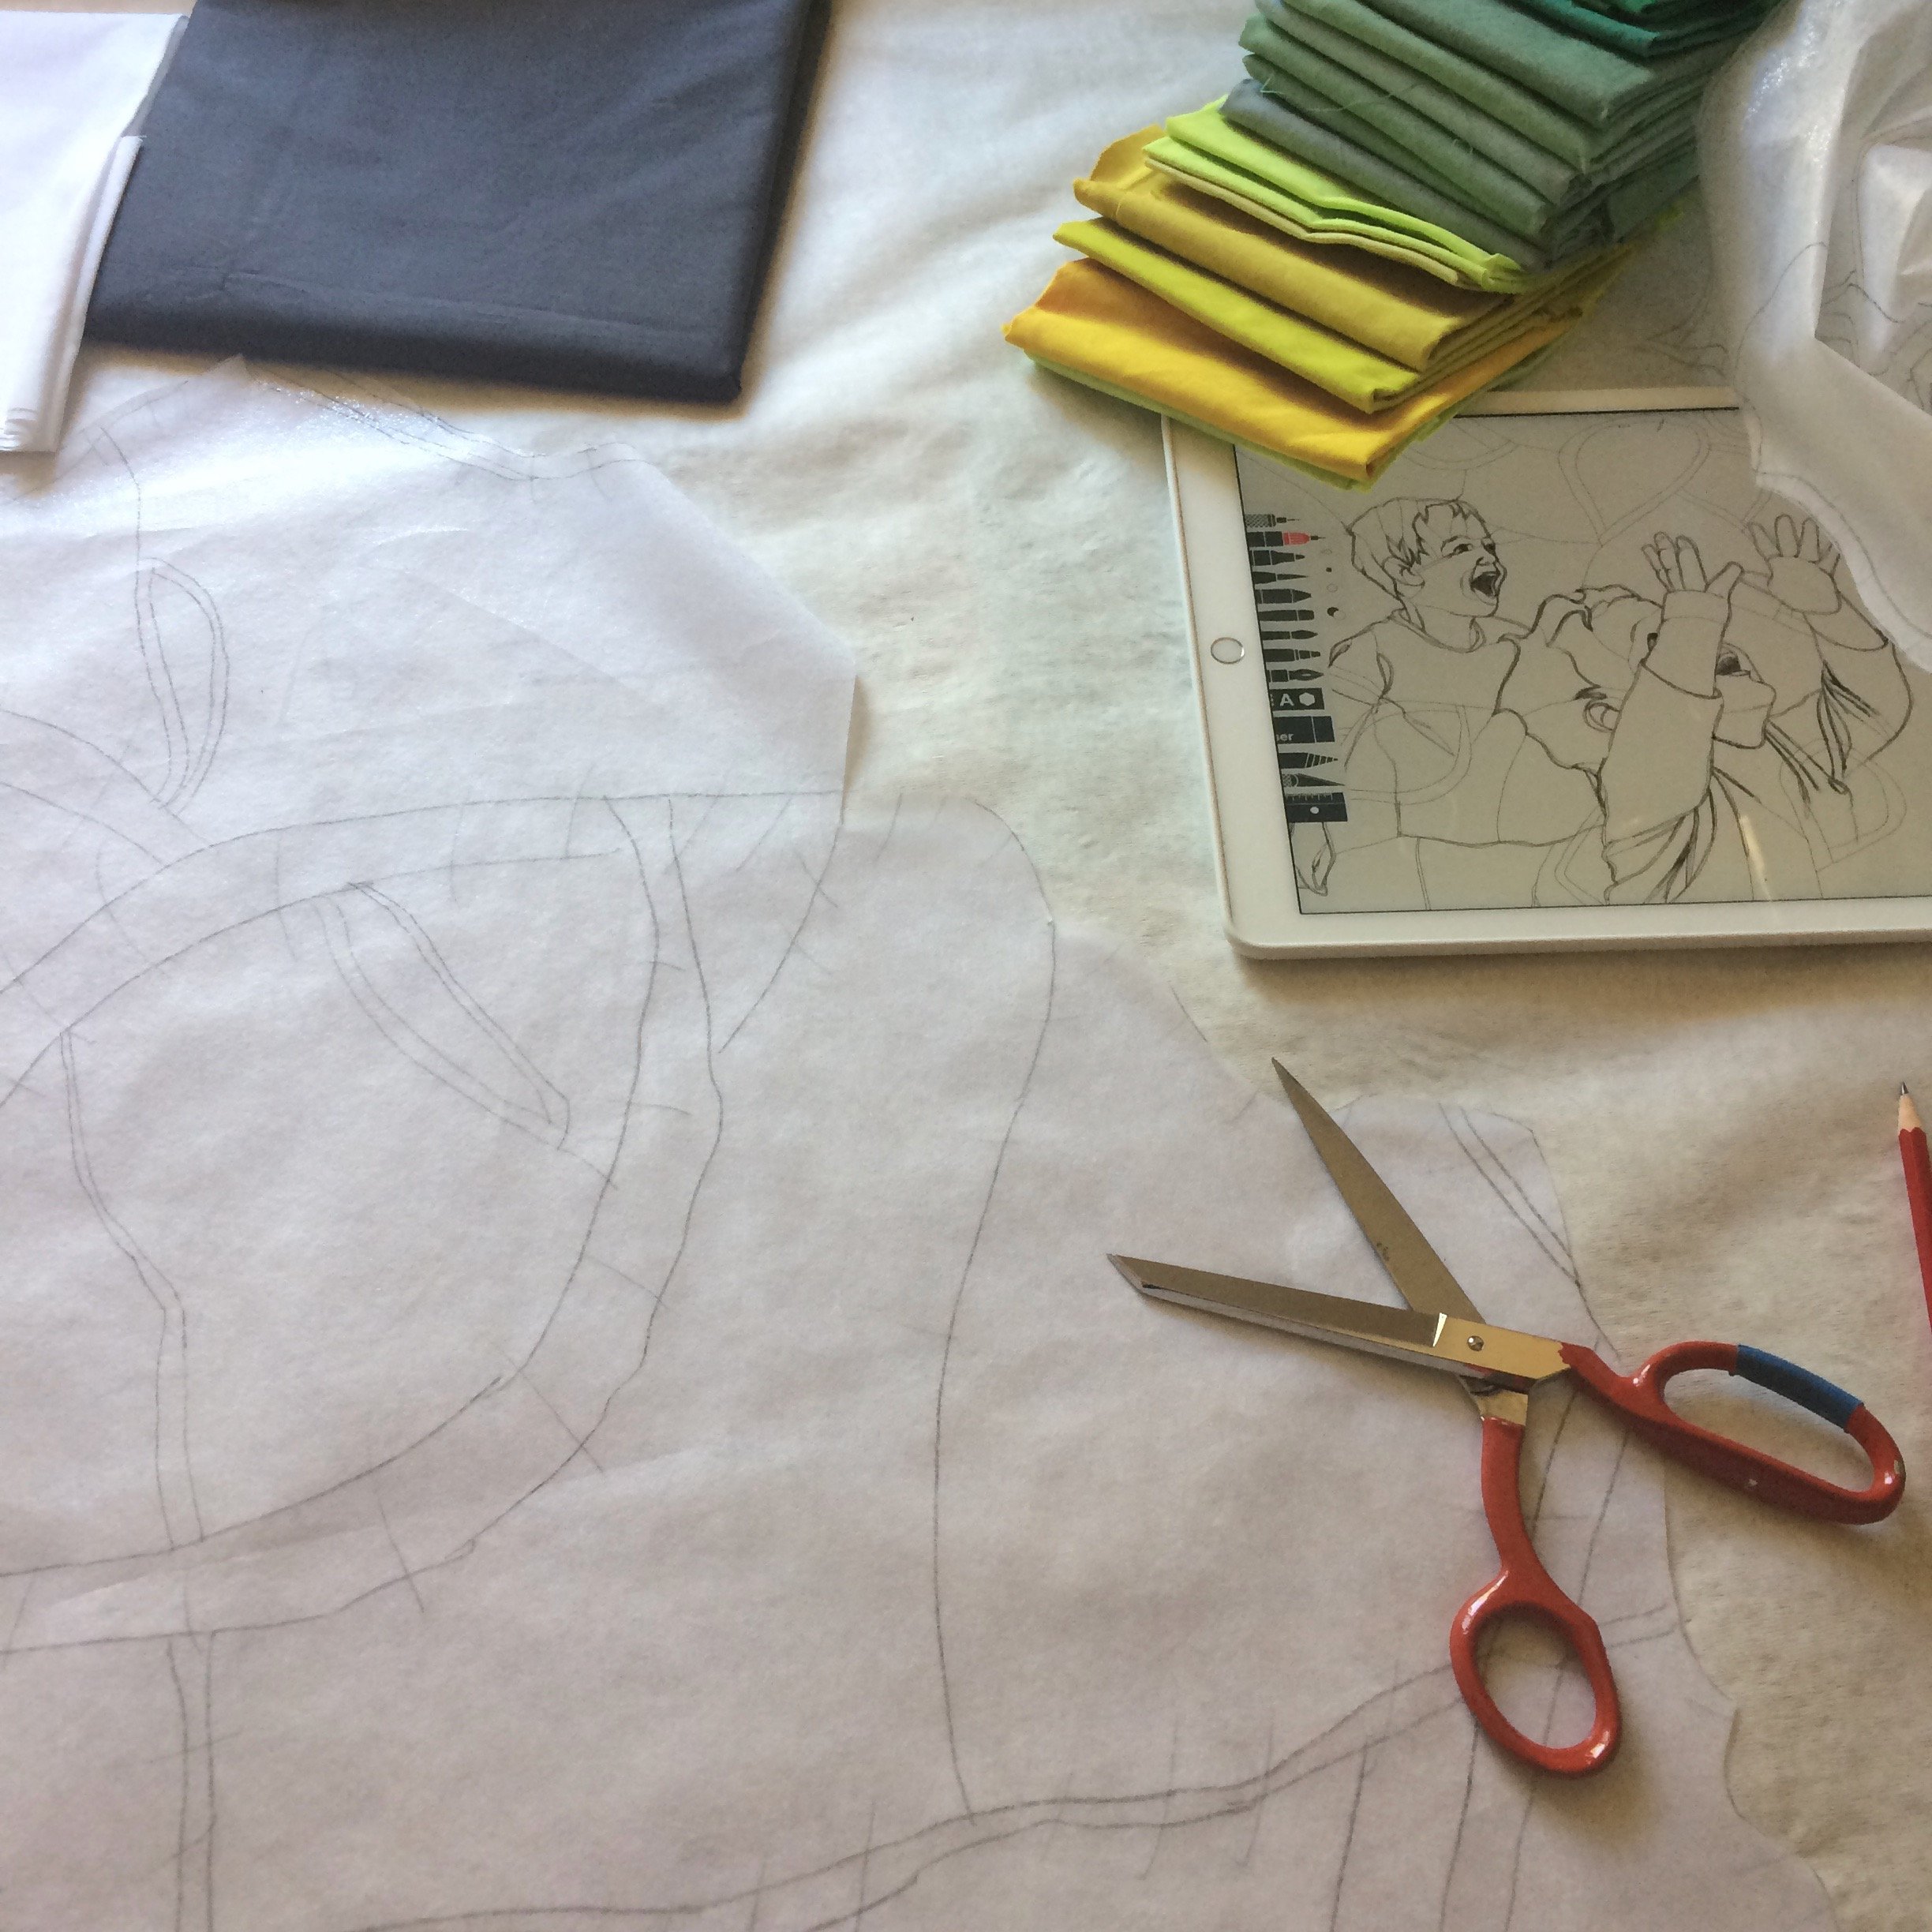
Many of my early eucalyptus quilts where drawn up on the computer using a computer aided drawing program, with the advantage that they could easily be scaled or otherwise changed. After that, my quilts depicting children were hand drawn, and scaled using the photocopier. I’ve since discovered that there are apps that let you enlarge a drawing to the exact size you want it to be, and then print it over as many A4 papers as necessary. So my designs now get enlarged that way. I scan my final drawing and print it out to the correct size, on multiple sheets of A4 paper. The full-scale design is patched together with sticky tape (sometimes there are as many as 80 sheets of paper), but this beats hours (and small change) I used to spend at the library photocopier trying to enlarge the image to exactly the right size.
So at this point in the process, I have a full size pattern for my artwork, depicting where all the seamlines will be in the finished quilt (or in other words, showing each colour ‘block’ or shape) as well as a small-scale colour plan.
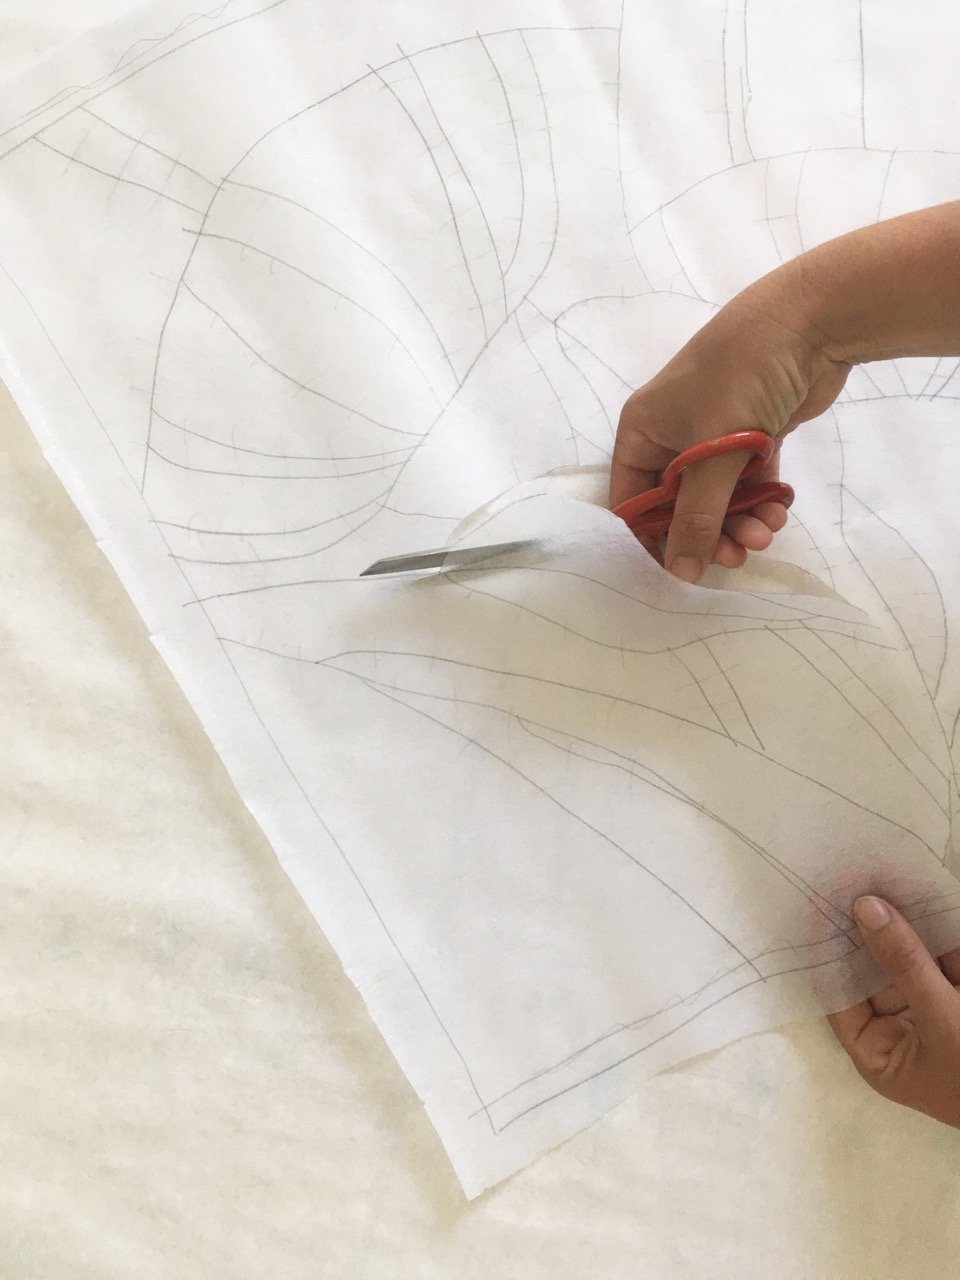
The full-scale drawing is traced onto the ‘sticky’ side of iron-on interfacing. This interfacing becomes my working pattern. I add notch markings to all the seam lines. These are important for matching the pieces exactly together, down the track.
At this point, I’m ready to start cutting out the pieces for the new artwork.
cutting out
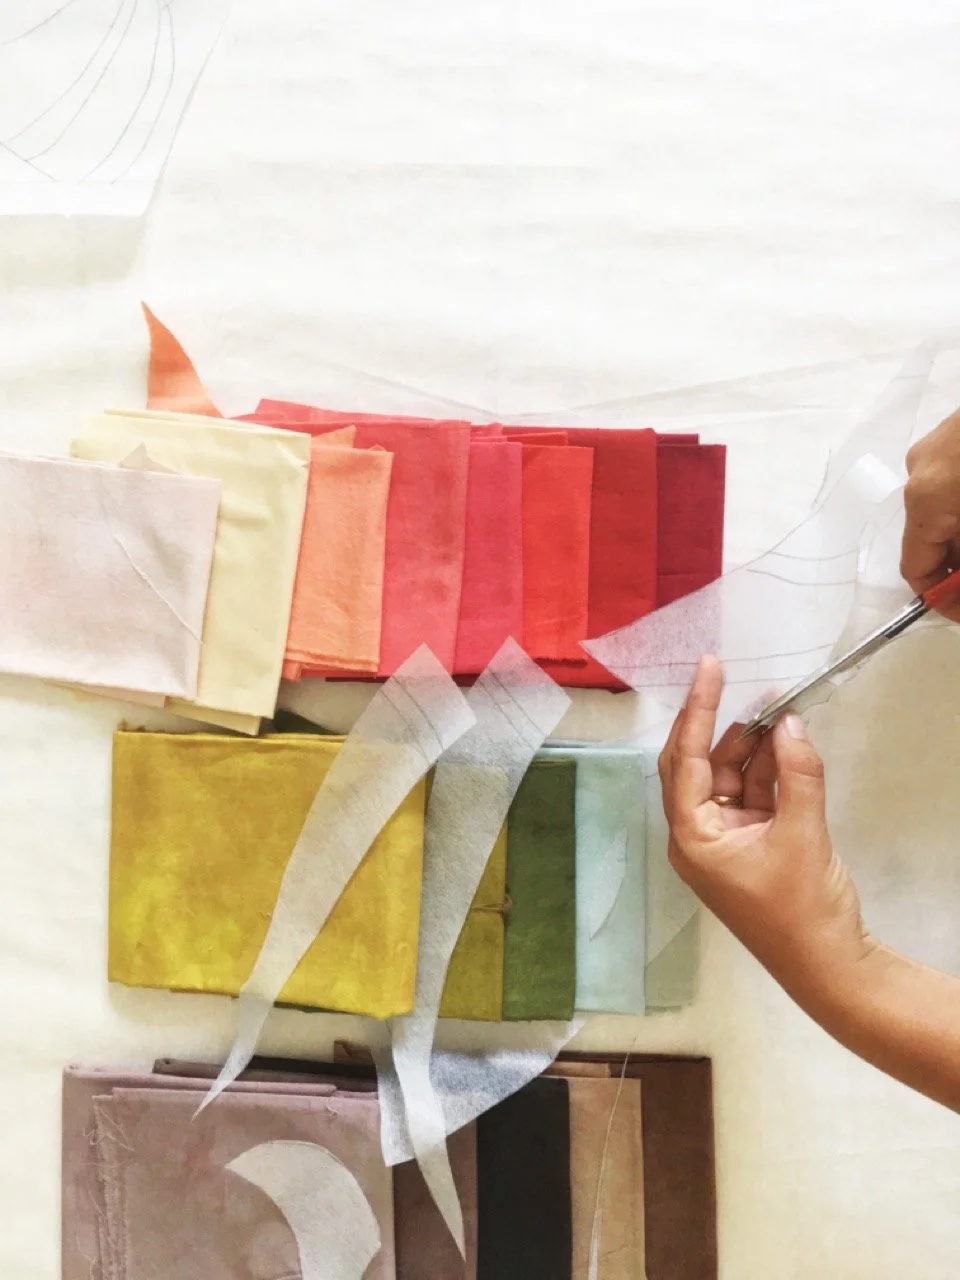
The next stage in the quiltmaking process involves cutting out the quilt pieces.
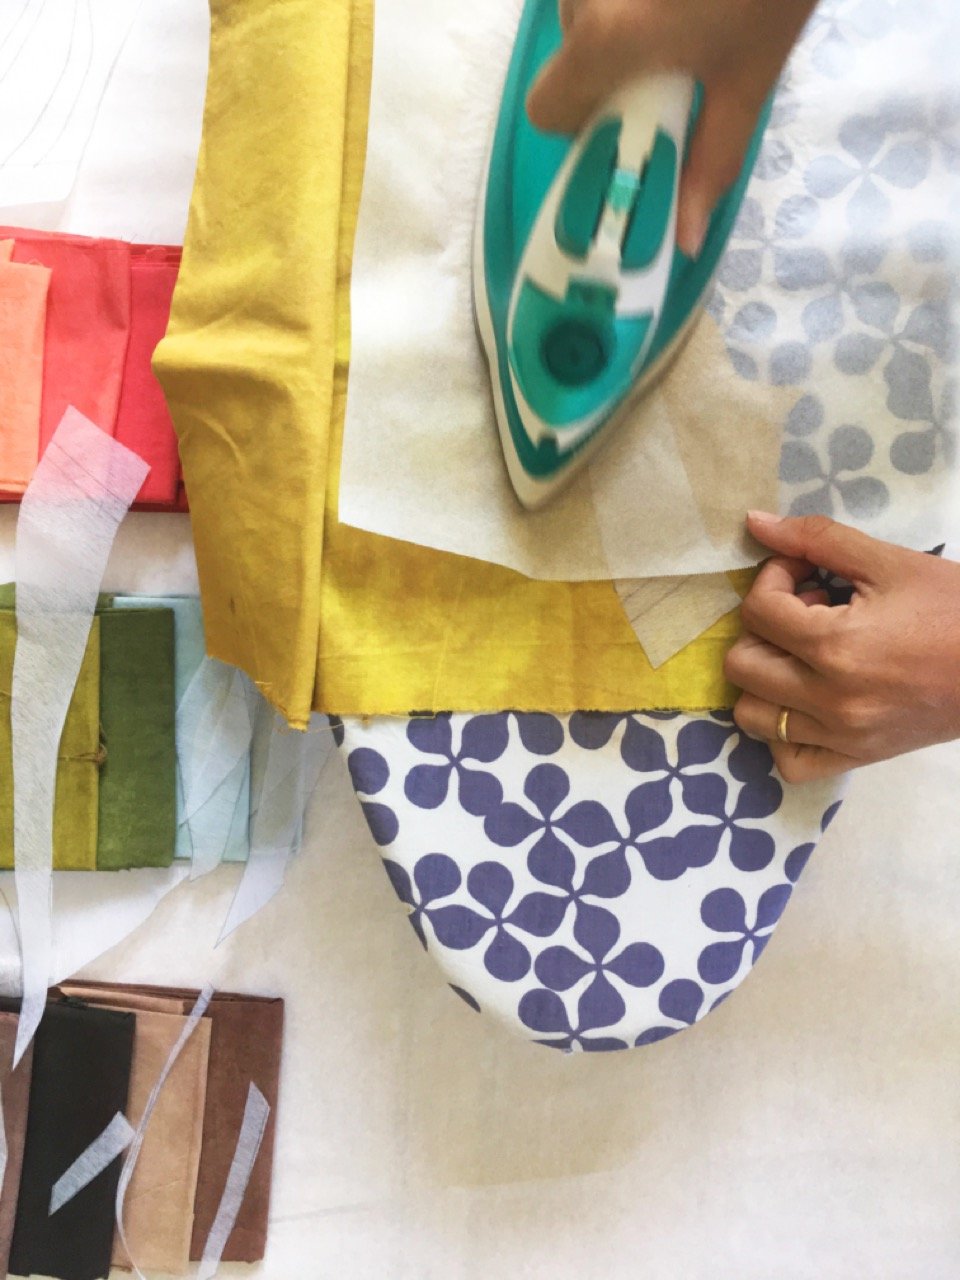
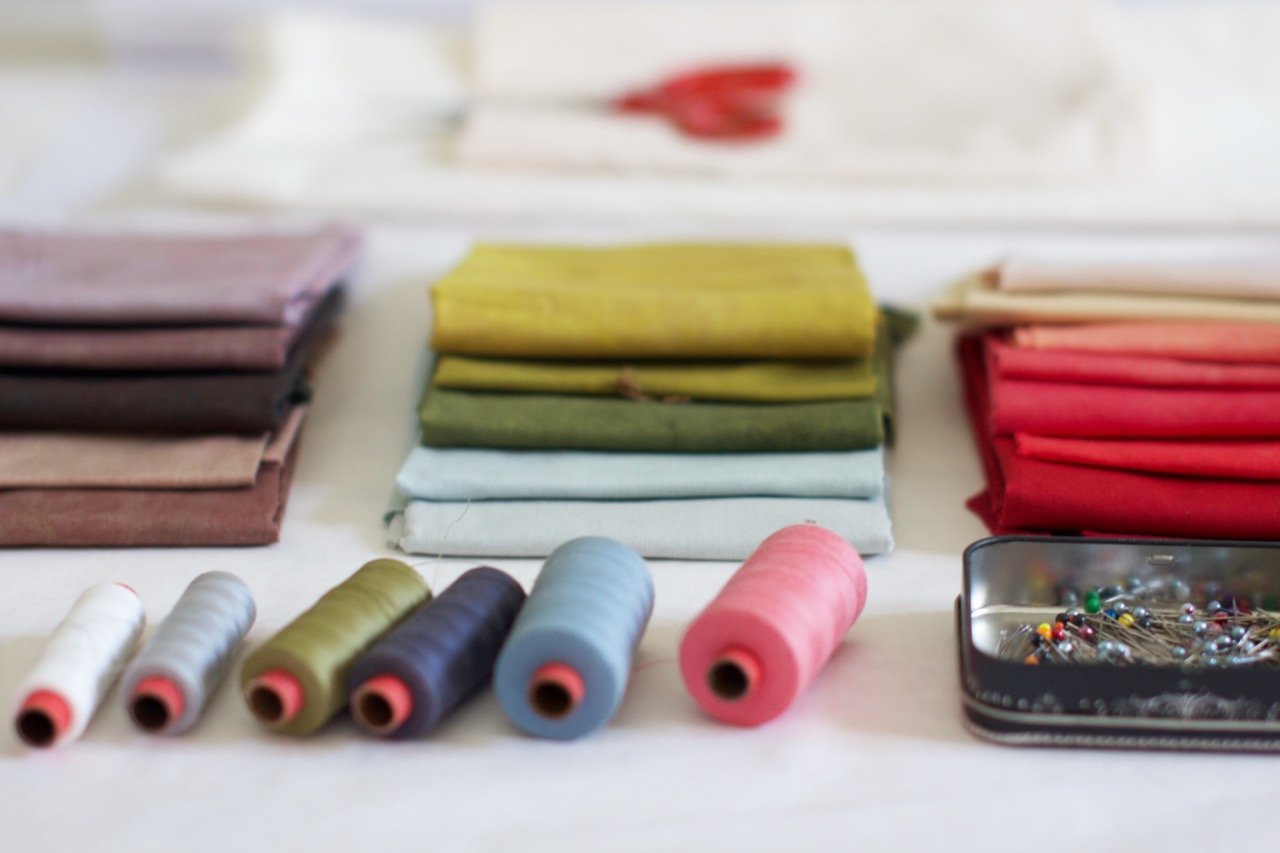
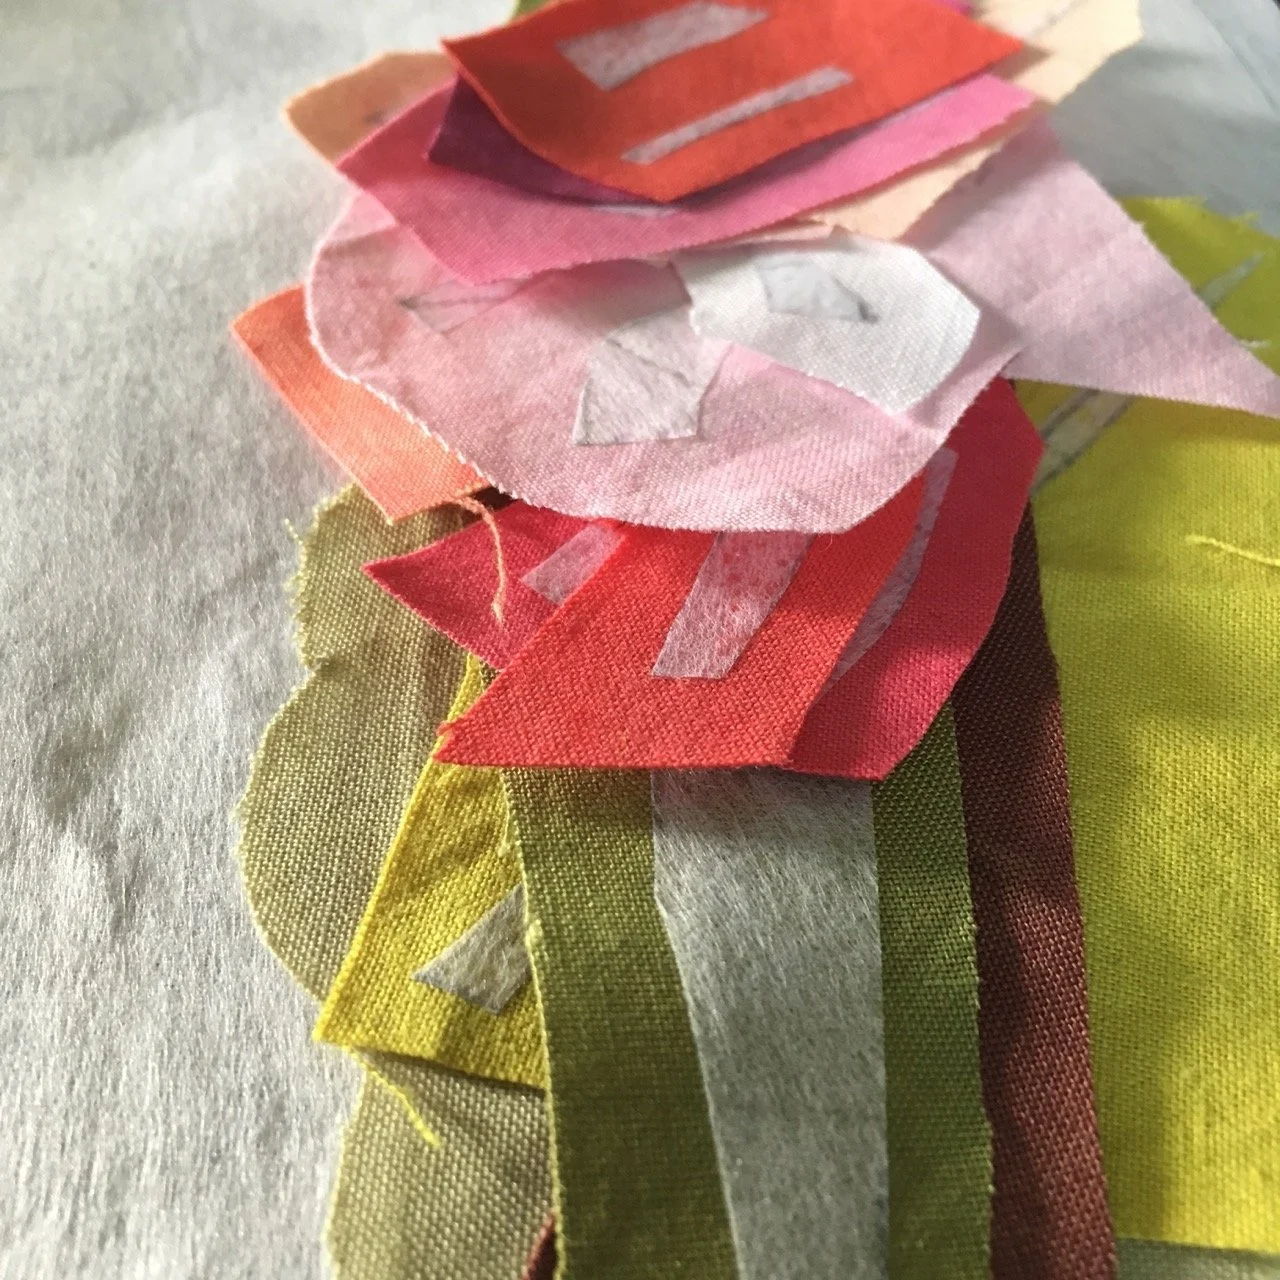
The interfacing pattern is cut into individual pieces and each piece is ironed onto the correct colour fabric. I have a very systematic process for this. I work on a small, manageable section of the quilt, and have my chosen fabric colour palette laid out on my work table. I cut out the interfacing, place each piece on the correct colour, and then take the required fabrics to the ironing board to iron them on to the fabric. Once a piece of interfacing is ironed onto the correct fabric I cut around it, leaving a seam allowance.
It is not necessary for the seam allowance to be exact, because in the piecing stage I match the edges and notches of the interfacing rather than of the fabric. The interfacing remains in the quilt. I find this method the best way for me to achieve smooth and accurate piecing.
puzzling it back together
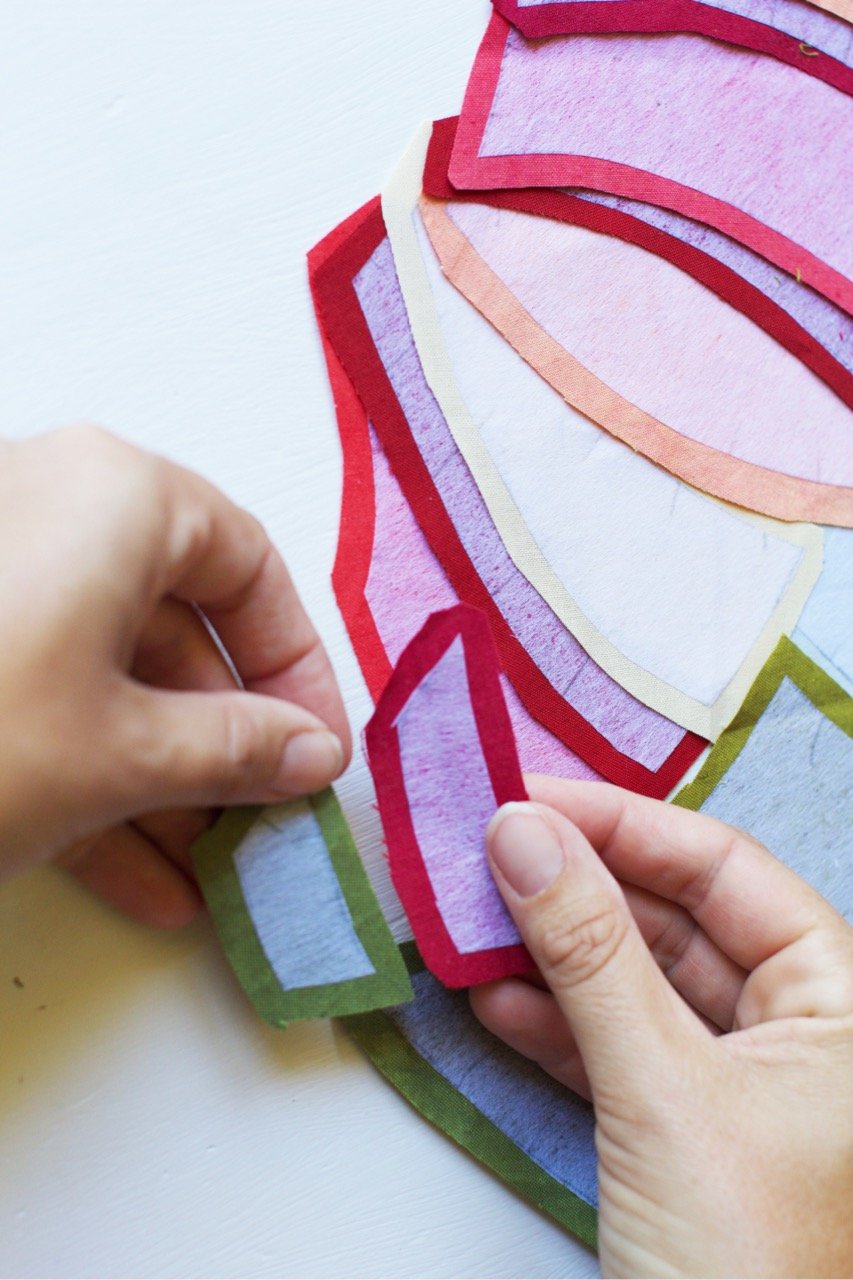
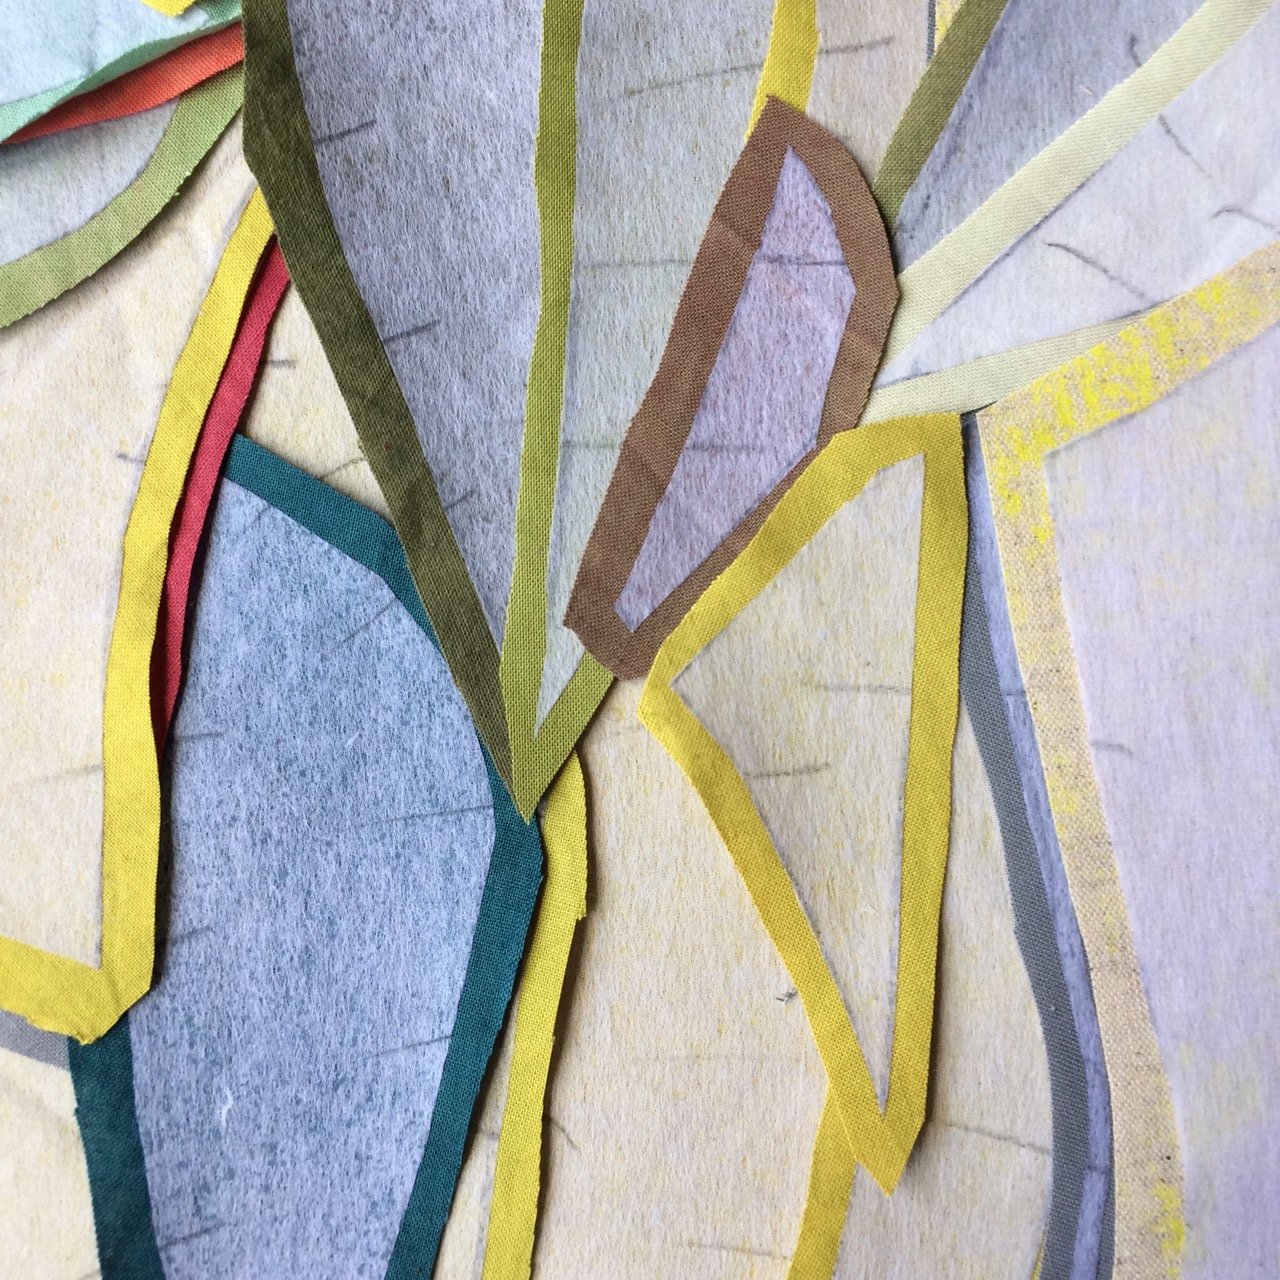
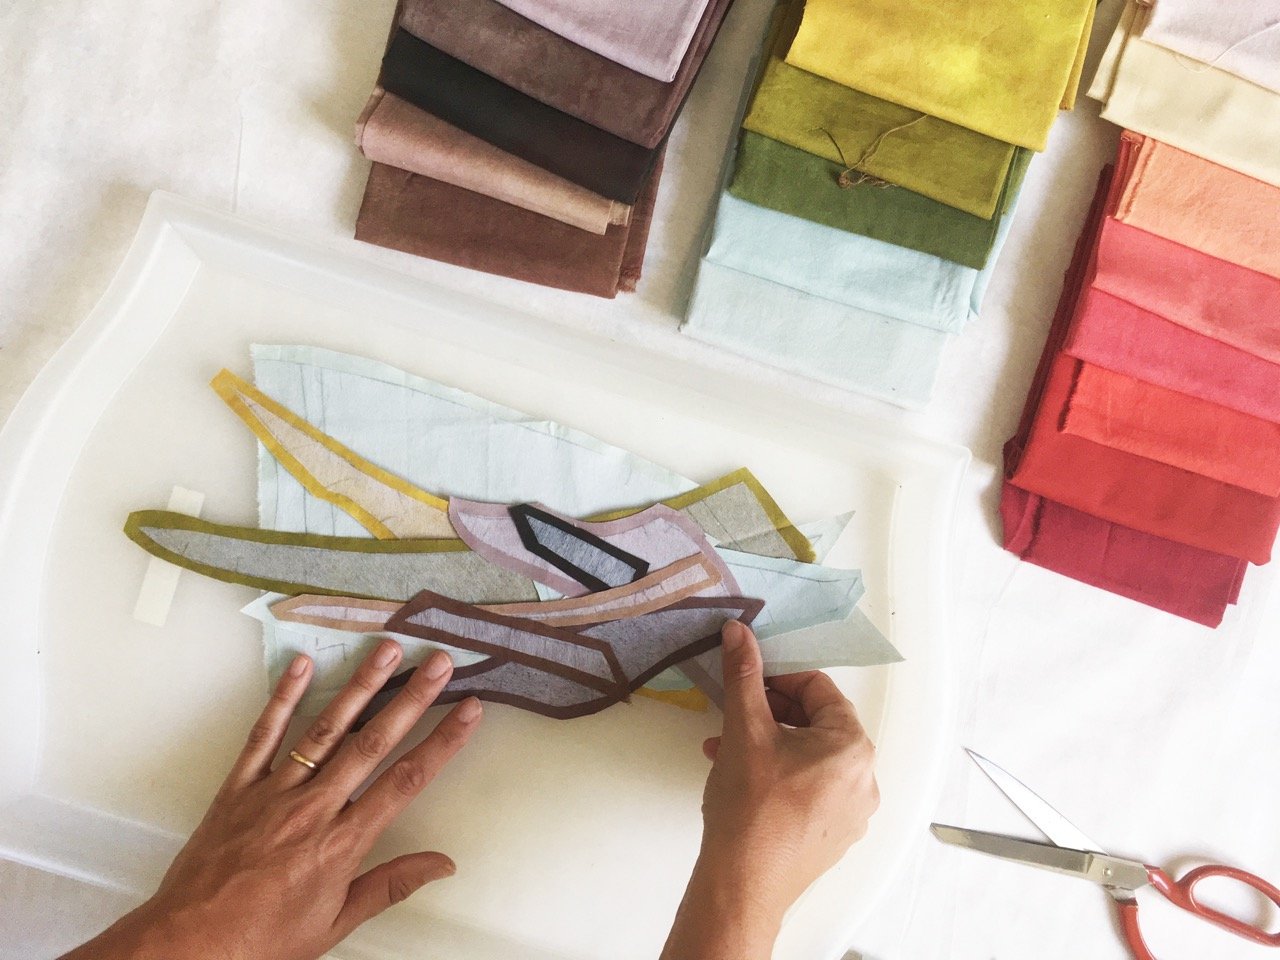
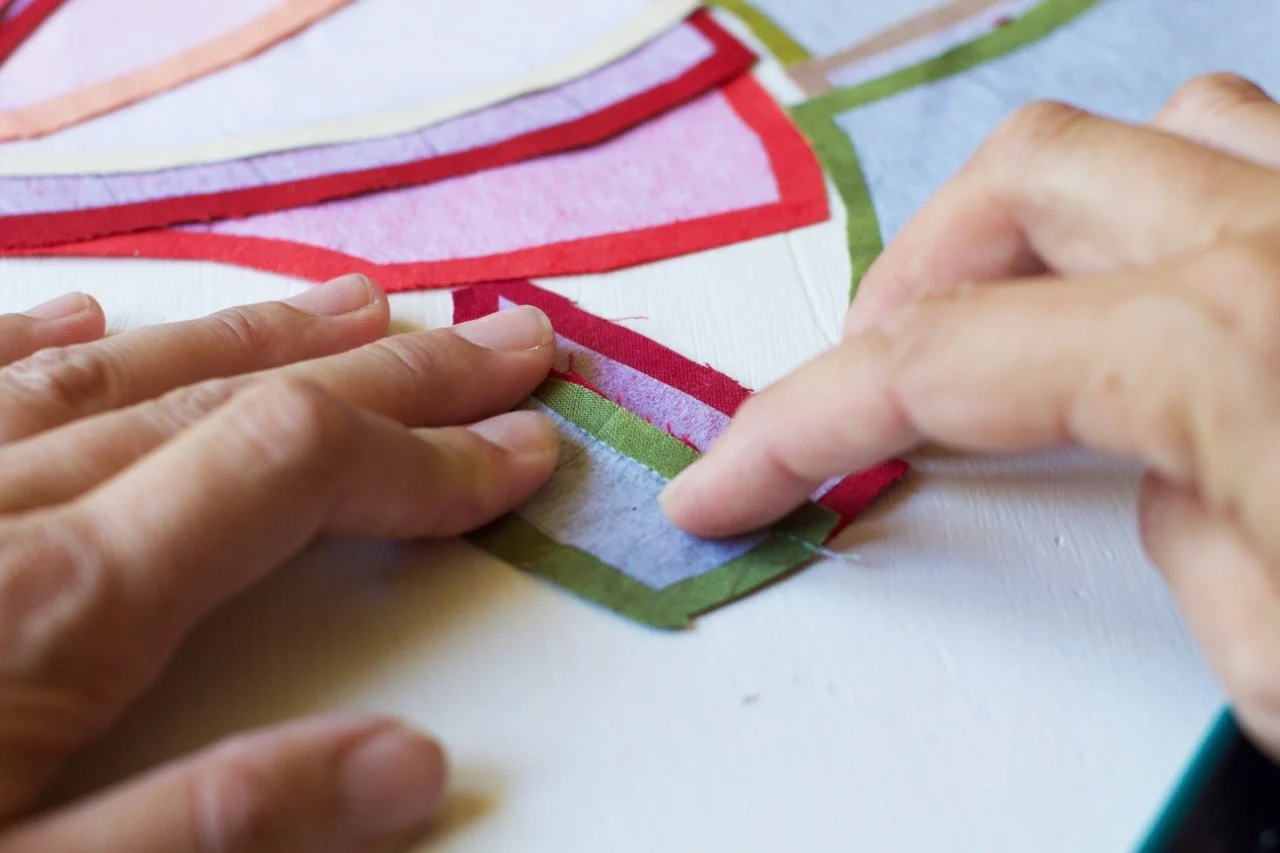
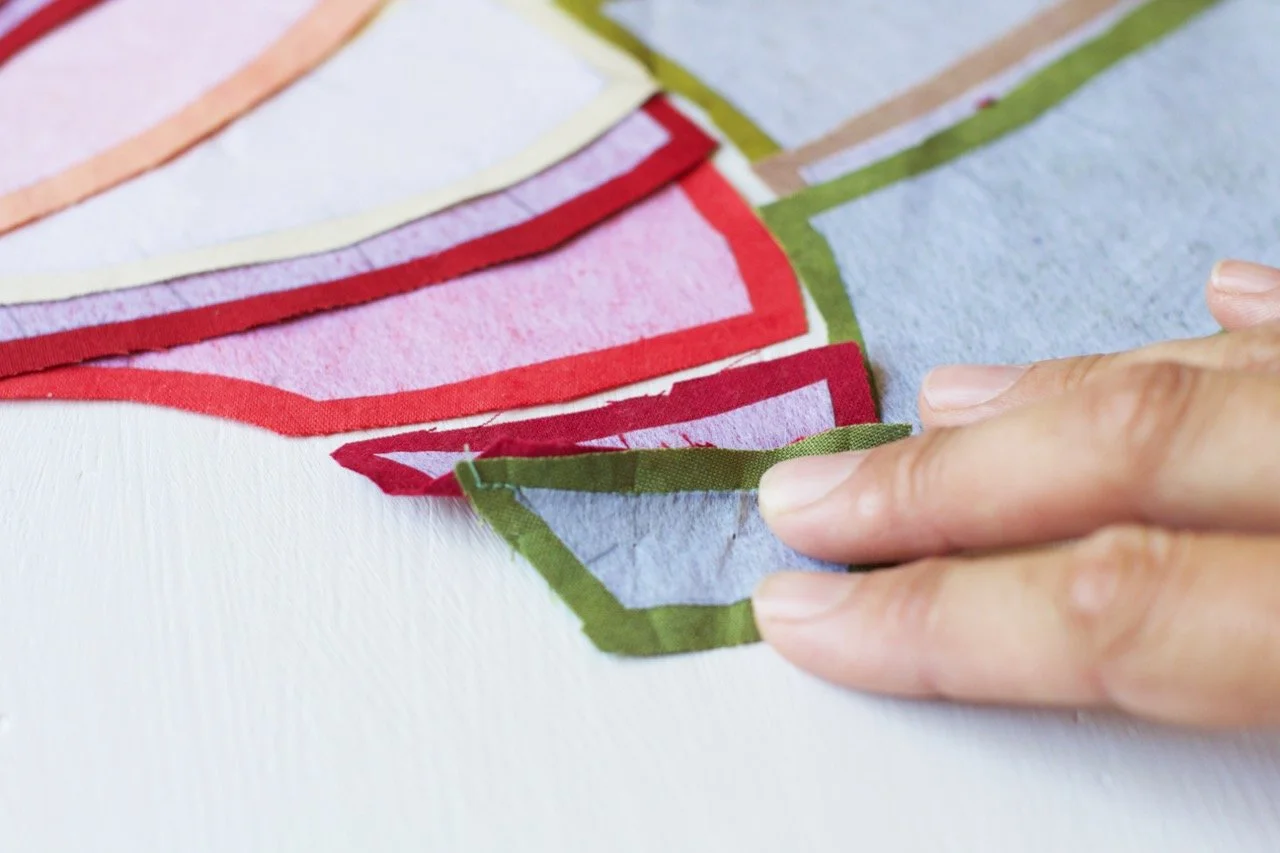
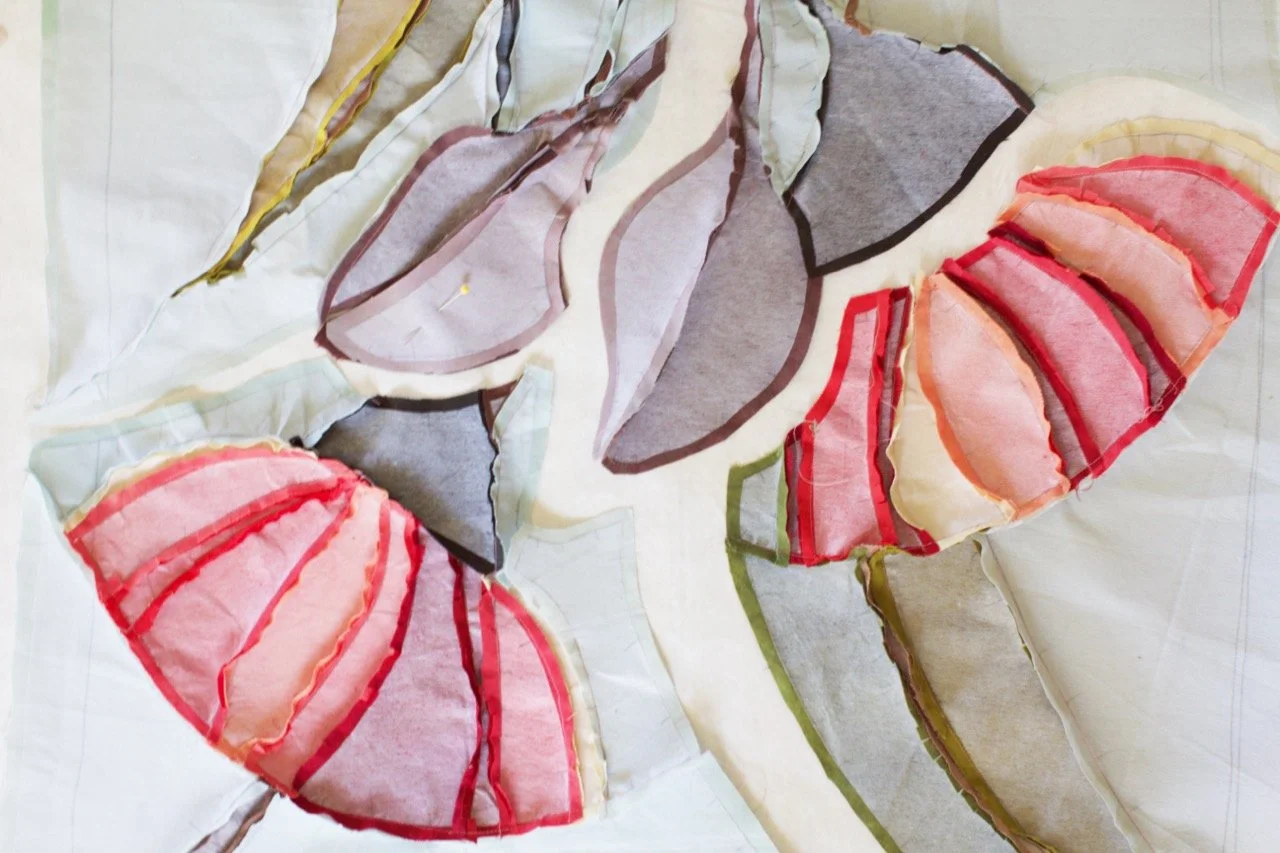
Once all the bits have been cut from the correct colour fabrics, the next step is to lay them out ready for stitching together.
I already mentioned that the cutting out happens in small sections. So now at this point I have little piles of quilt bits, with each pile belonging to one small section of the quilt. When the quilt bits are placed upside down so that the interfacing is showing, I puzzle them together (one pile/section at a time). The interfacing I use has a ‘grain’ to it, which helps me see which way around the piece needs to go. I also look at matching up all the ‘notches’ or ‘dashes’ that I drew when tracing out the design. Once a section has been laid out correctly (this is very much like doing a jigsaw puzzle), it is ready to be stitched together.
That’s the basic idea, at least. Very often I muddle up this systematic process somewhat by incorporating some screenprinting or painting in between. This involves taking all the background pieces from the various piles, laying them out right side up, painting or printing them, and then putting them back in their piles. In some quilts I will then do a bit of piecing/stitching before printing over the top again.
(Once this quilt was pieced together, for example, I wasn’t quite happy with it, so I unpicked some of the seams and did some more painting and screenprinting on it).
piecing
This is my most favourite part of my art making process -sewing all the little bits together. It is exciting every time again to watch the quilt design take shape – and it almost always looks even better than what I’d imagined.
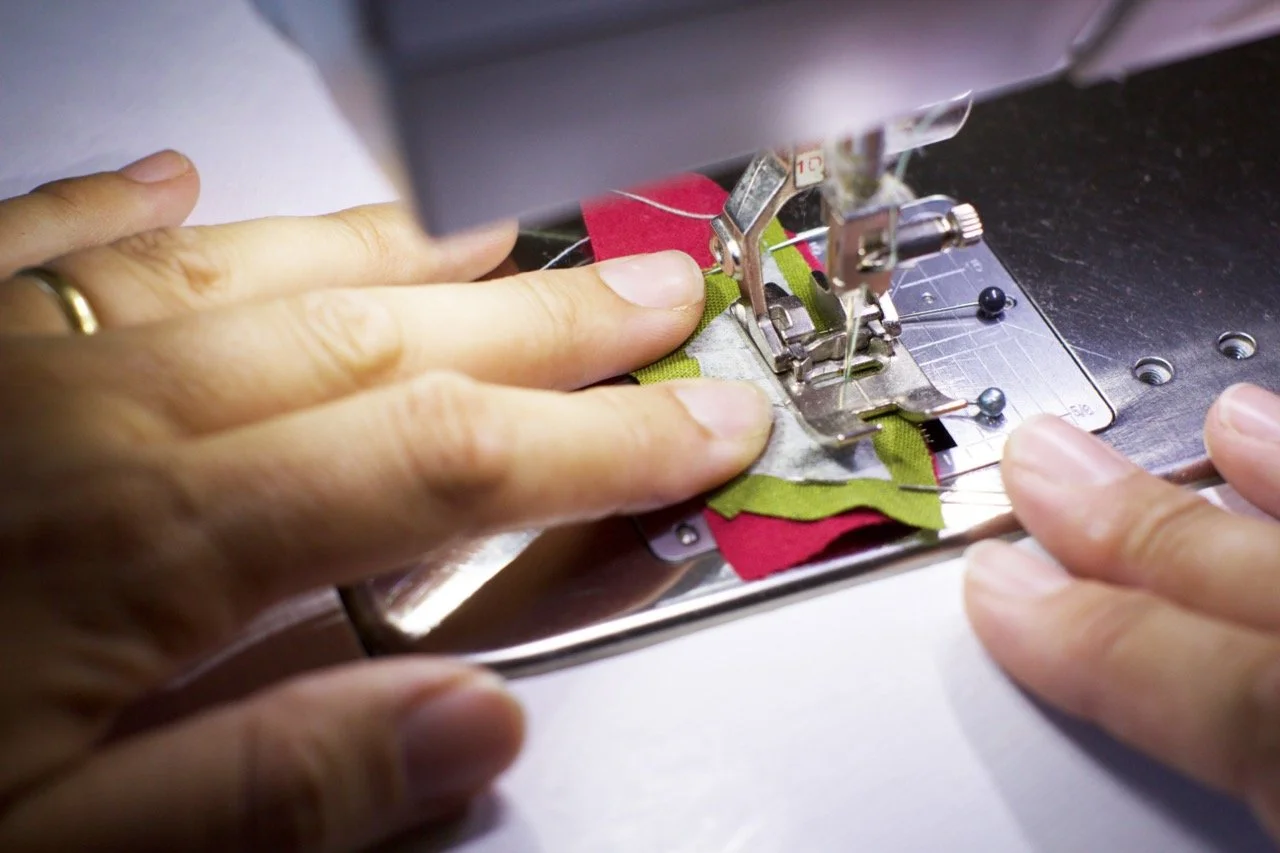
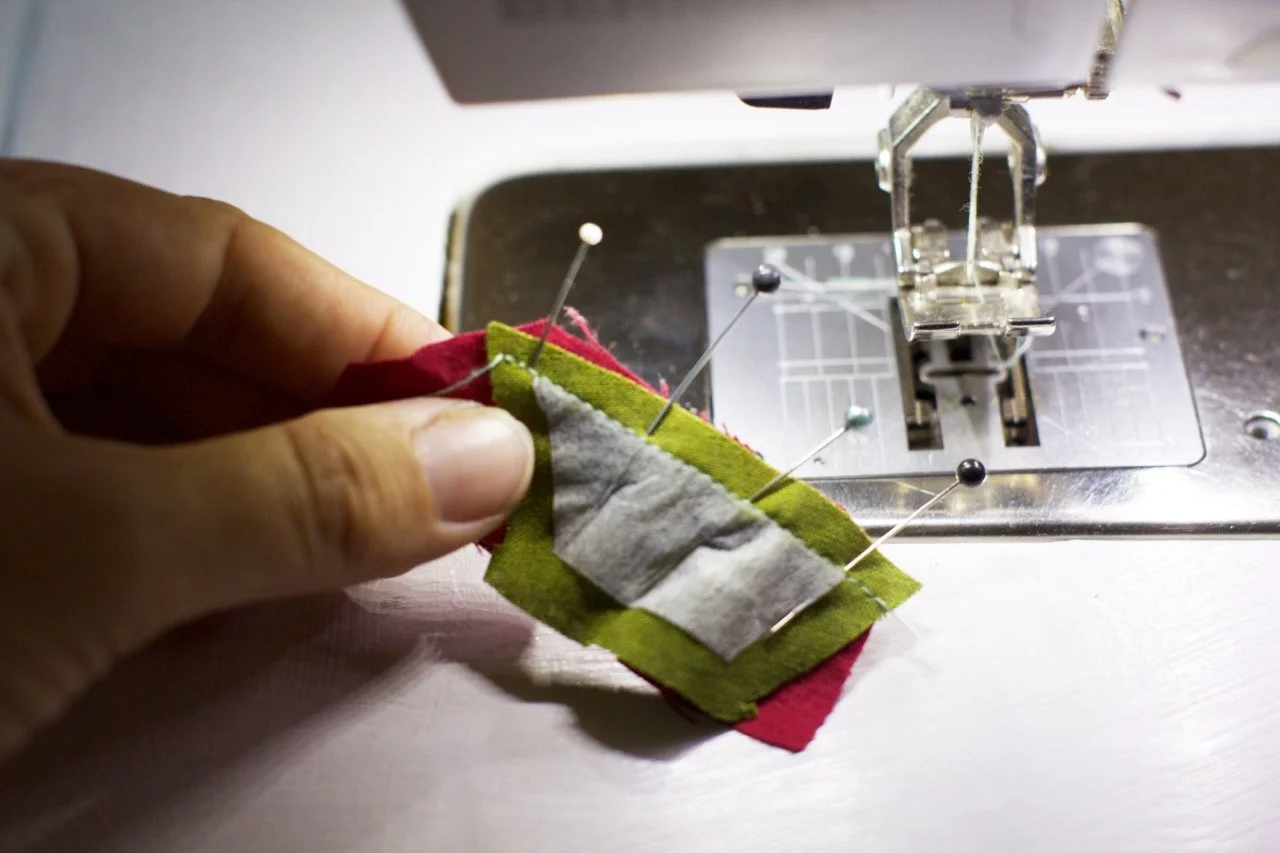
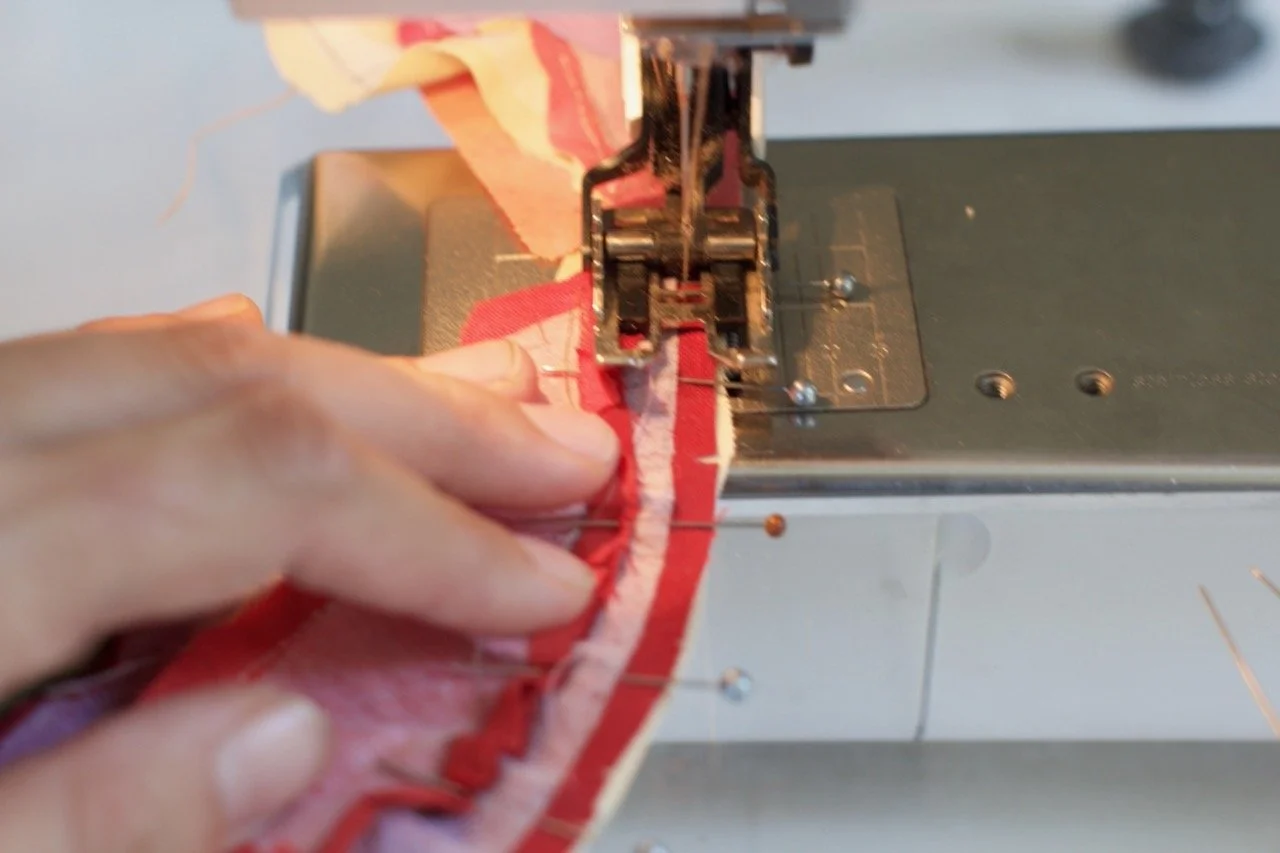
Once all the quilt pieces have been laid out (see previous post), the stitching begins. It’s as simple as taking two adjacent quilt pieces, placing them right sides together and pinning them together carefully so that their adjoining interfacing edges match up exactly and then stitching right along the edge of the interfacing. (This is where the dash/notch markings become critical (to enable accurate pinning). I usually tackle the more complex sections first (like faces and hands). Most of my piecing happens on the sewing machine, but more recently I have started piecing faces and hands by hand – it’s much more accurate and also much more relaxing (when I do the tricky bits by machine I often have to do a lot of unpicking!)
Sometimes I need to use partial seaming techniques .
I already mentioned that this is my favourite part – I can get completely caught up in this for hours at a time. (I tell myself that ‘I’ll just stitch one more bit’ and then ‘just one more’ and so on…). And if I’m getting to the last bits of a quilt, not even dinner or bedtime can get in the way of finishing it up!
The art quilt is then completed in the same way as all quilts - it is layered with a backing fabric, quilted, and bound.